As of last night, all of the electrical stuff is finished on the mural wall of the studio. This has been quite the project that started with having to remove drywall, remove spray foam insulation, move six junction boxes, rewire the outlets and switch, and fill in spray foam insulation that had to be removed.
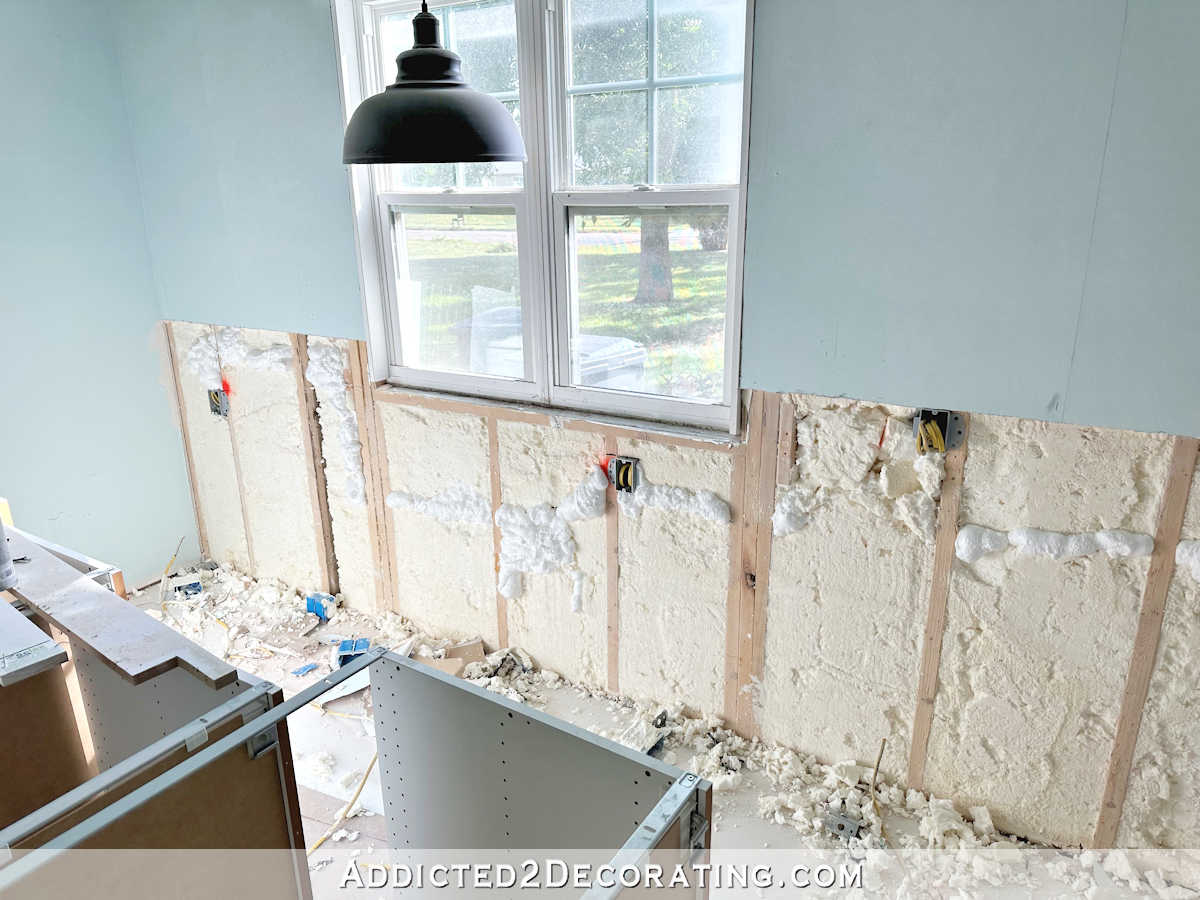
As I’ve explained before, the whole reason I had to do this was because I had originally planned to build my own cabinets for this room, which would have had a finished height of 30 inches. So I planned for the bottom of all of the outlets to be right at 32 inches on the wall, and I placed the junction boxes accordingly.
But then I decided to use IKEA Sektion cabinets instead of building from scratch, and those cabinet boxes alone are 30 inches high. So once I raised the boxes off of the floor with some little DIY feet (you can see how I did that here), and then added a countertop (you can see my DIY 20-foot countertop here), the new finished height was 34.25 inches. And suddenly, my junction boxes that were in the perfect position for a 30-inch-high countertop were now too low.
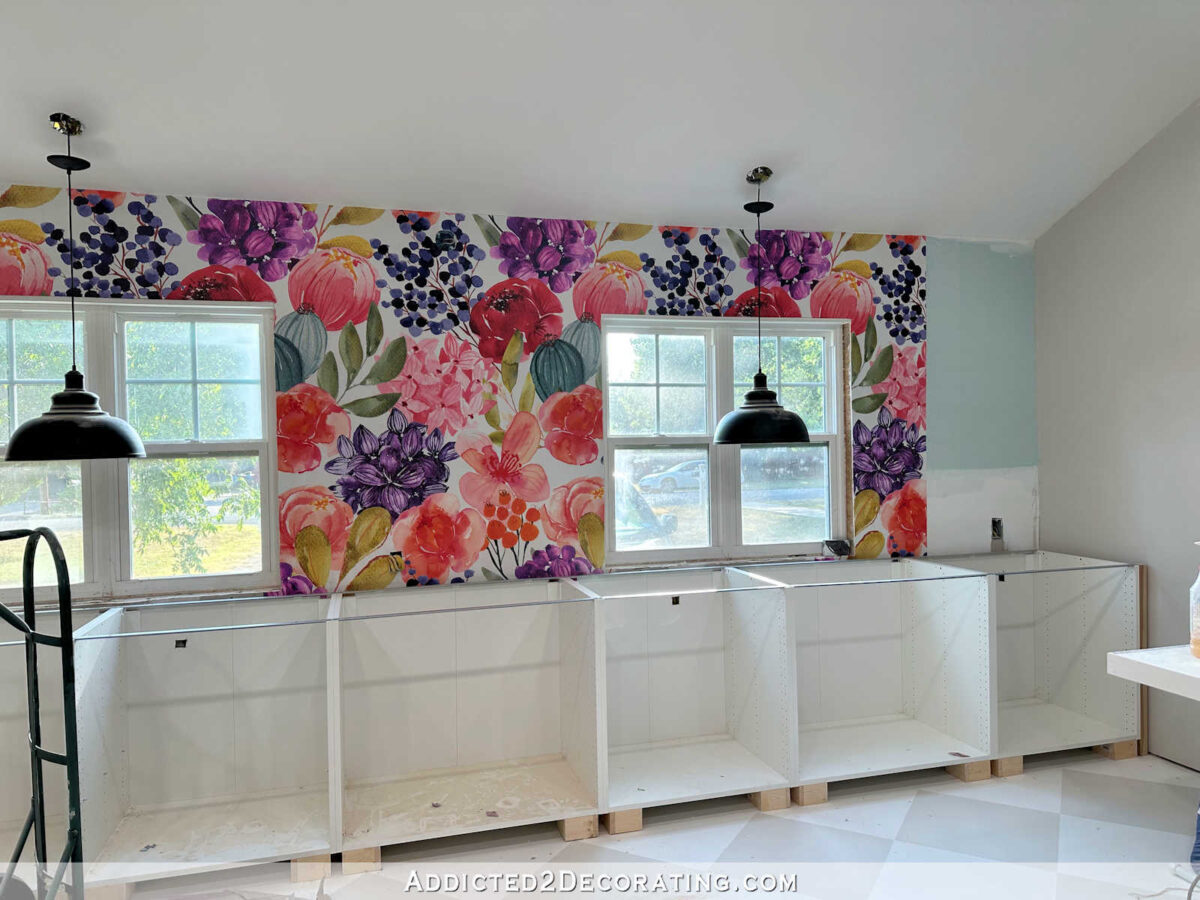
So that meant they all had to be moved. There were a few people who were very confused about why I decided to move the outlets down on the wall instead of up. Moving them down meant that they would be behind the cabinets. But I didn’t want all of those outlets to show on the mural, so I decided to move the junction boxes down, install the outlets inside the cabinets, and then use countertop grommet outlets spaced out on the 20-foot-long countertop.
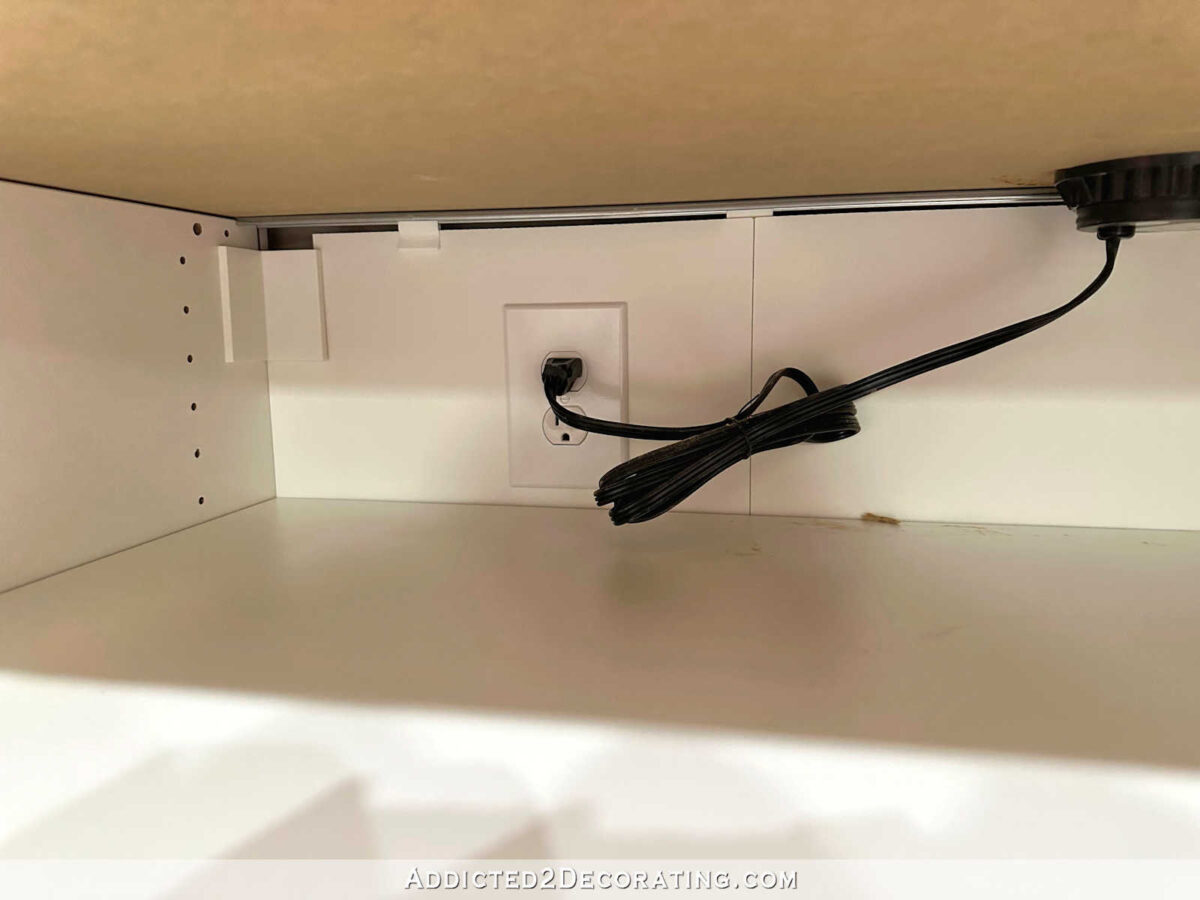
Here’s how the wall looked after I moved the junction boxes down and re-drywalled the wall (but before I did the taping and mudding). The junction box in the middle is a light switch that had to be above countertop height, but the other two are outlets that are below countertop height.
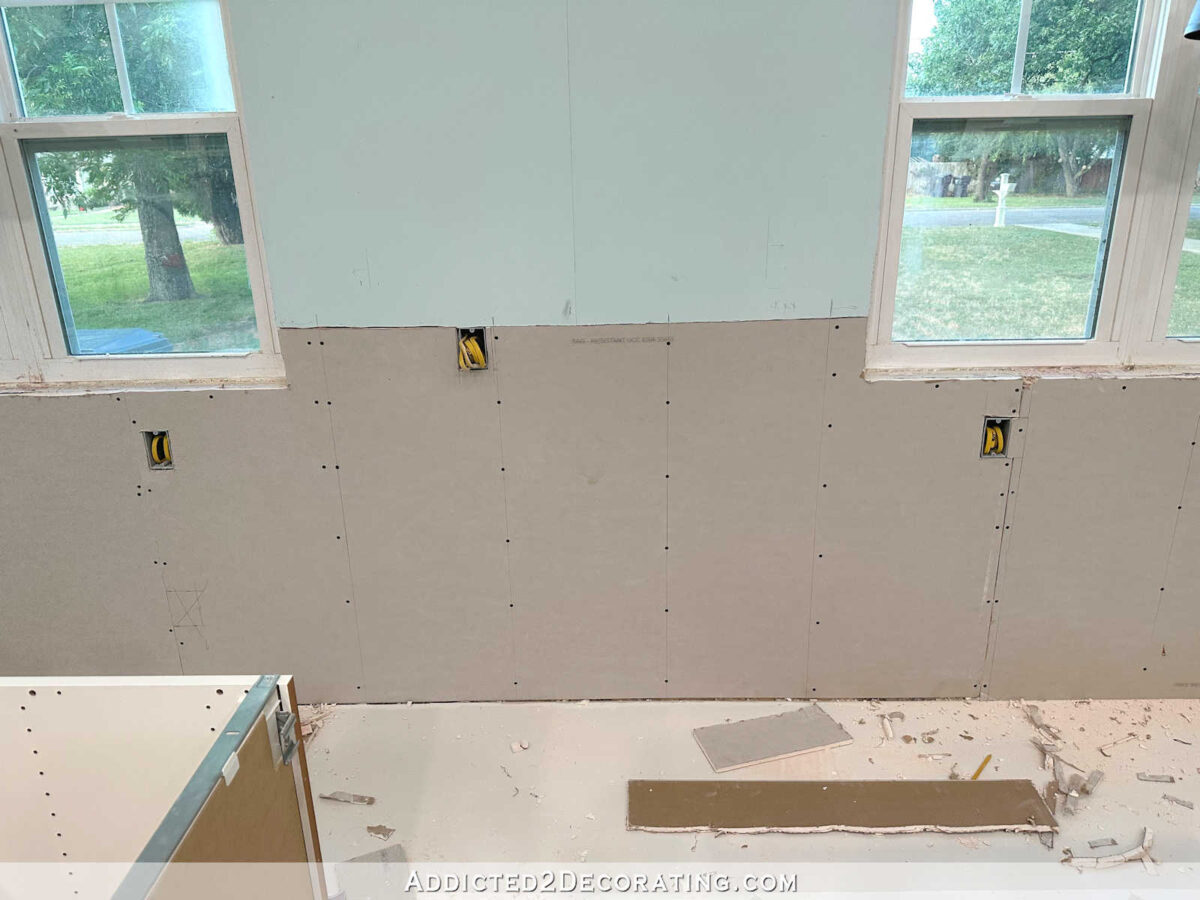
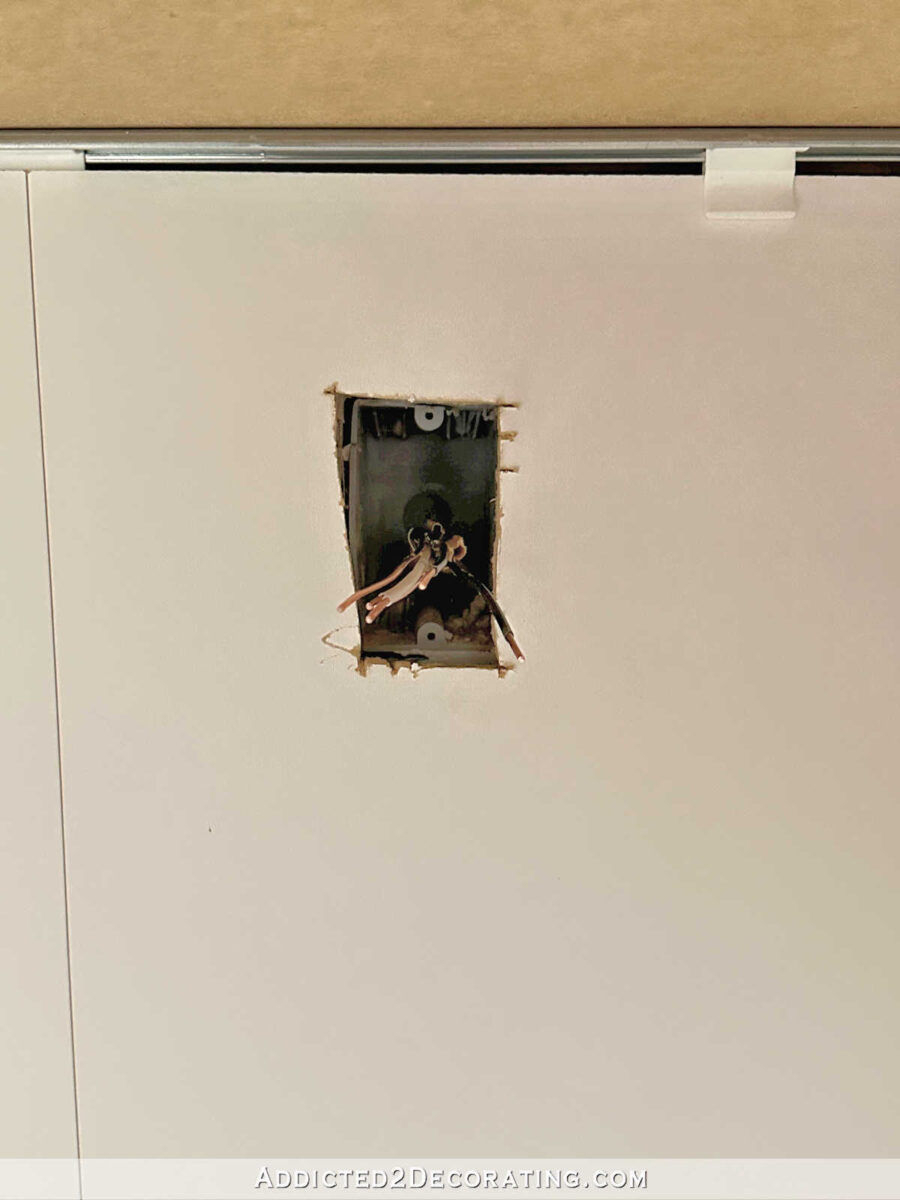
So when I installed the cabinets, I marked and cut little squares out of the backs of the cabinets where the junction boxes were. You can see the little cut out squares in every other cabinet in the photo below. And because of how I installed the cabinets (you can read more about that process here), the cabinets stood away from the wall about an inch.
To install the outlets, I used my Dremel Multimax (affiliate link) with a straight cutting blade to cut out the back of the cabinet to fit an outlet. I didn’t do a perfect job, as you can see below, but as long as (1) it lines up with the junction box pretty well, (2) it isn’t cut too big, and (3) the two screw holes are accessible, it’s fine.
Then I used this single gang junction box extender that I got at Home Depot…

And I fit it into the hole with the wires coming through the center. It won’t stay in place until it’s screwed into place, but that can’t happen until the outlet is wired.

After wiring up the outlet, the long screws (which come with the junction box extender) go through the outlet, and through the outlet extender, and into the screw holes in the junction box.

Add an outlet cover, and it’s finished!

And then I repeated that three more times so that I had four in-cabinet outlets on this wall.

Those in-cabinet outlets gave me somewhat accessible outlets on this wall, but they were anything but convenient. So to add convenient accessibility to outlets on this wall, I used these countertop grommet outlets (affiliate link) with two outlets, two USB ports, and one mini USB port.

I chose those because of the arrangement of the outlets and USB ports, and because of they took up less space inside the cabinet than others that I found. I really liked some of the pop up countertop outlets that I saw, but they would have taken up more space inside the cabinet.
To mark the countertop, I unscrewed this piece from the outlet and used it as a pattern to mark where the hole needed to be cut in the countertop.

I used a Sharpie marker to mark the hole because I learned very quickly on my first one that the MDF dust from the countertop covers up pencil marks almost immediately, making them impossible to see.

I think the hole is a standard size so that you could use a hole saw, but I hate buying tools for one single project. Plus, I absolutely hate using hole saws. So I decided to make do with the tools that I already have. I drilled a starter hole in the countertop using a 1/2″ drill bit.

And then I used my little palm router with a straight cut bit to cut the hole.

Unfortunately, the bits that fit my little palm router aren’t long enough to cut through both layers (the laminate flooring boards and the MDF base) of the countertop. It was deep enough to cut all the way through the laminate flooring boards, but it only cut about 3/4 of the way through the MDF. So then I had to improvise. Using my hammer and a small flathead screwdriver as a chisel of sorts, I made some perforations around the perimeter of the hole. And then I used my hammer to whack the middle of the remaining MDF piece. With one good whack, the last circle of MDF came out.

It didn’t look pretty. 😀 But I could work with it.

At this point, I checked the fit of the part of the hole that I had routed out with the palm router. I had to make a couple of additional passes around the circle with the router, but it finally fit.

There was still the issue of that very rough, chewed up bottom layer of MDF that wouldn’t allow the outlet to seat all the way inside the hole, though. So to clean that up, I had to improvise once again. I used my drill with a 3/8-inch bit, and basically used it as a kind of poor man’s router. 😀 Using the drill on the highest speed, I ran the drill bit around the inside of the circle a few times, and the drill bit at high speed made quick work of cleaning up all of the rough edges of that bottom layer of MDF.

I just kept making passes around the circle with the drill bit at high speed until the bottom of the hole matched the circumference of the top routed part of the hole, and until the grommet outlet would fit completely inside the hole.

And then from inside the cabinets, I screwed the bottom piece into the outlet. That piece also has screw holes in it, and it comes with a few tiny screws so that you can screw the outlet into place, but I decided not to use them. It stays in place just fine without those.

And then the grommet outlet plugs into the in-cabinet outlet.
So the grommet outlets are basically just fancy extension cords. But I do love the convenience they add to this long countertop, and I also love that they allow me to have plenty of access to outlets without me having to put outlets on the mural.

In fact, do you remember this one outlet on the mural wall that I showed y’all yesterday?

Well, I ended up putting a grommet outlet on this end of the countertop as well. So I’m going to go back and take out that wall outlet and use a solid plate to cover over that junction box.
I had forgotten that that was my original plan. I had to have that junction box there because you can’t bury electrical connections behind drywall. But I remembered yesterday that while the junction box does have to be there, I had never intended to put an actual outlet there. So once I replace that outlet with a solid plate, it’ll disappear even more than it does now, and I’ll have a convenient grommet outlet in that area instead.
I’m so glad to finally have all of this electrical stuff finished! And I’m glad to have that grommet outlet project in my rearview mirror. I’ve been stressed about the thought of cutting holes into the top of that countertop. A mistake on something like that isn’t easy to fix. But I just made sure that I went very slowly and intentionally as I was cutting with the router, and I was able to get through all four with no mistakes.

Addicted 2 Decorating is where I share my DIY and decorating journey as I remodel and decorate the 1948 fixer upper that my husband, Matt, and I bought in 2013. Matt has M.S. and is unable to do physical work, so I do the majority of the work on the house by myself. You can learn more about me here.