I’ve painted cabinets so many times in my DIY life that I’ve lost count, but when I decided to use IKEA Sektion cabinets in my studio, the thought of painting them made me nervous. I had no idea how to paint IKEA cabinet, or if it was even possible. After all, there are certain materials that just shouldn’t be painted because if you do paint them, it probably won’t last long.
I had never used IKEA cabinets before, so I had no idea what the factory finish was like, or what they were made of. But after reading on the product description for my Veddinge doors and drawer fronts that they were made of fiberboard, polyurethane paint, and acrylic paint, I felt confident that they could be painted with a durable finish that will last.
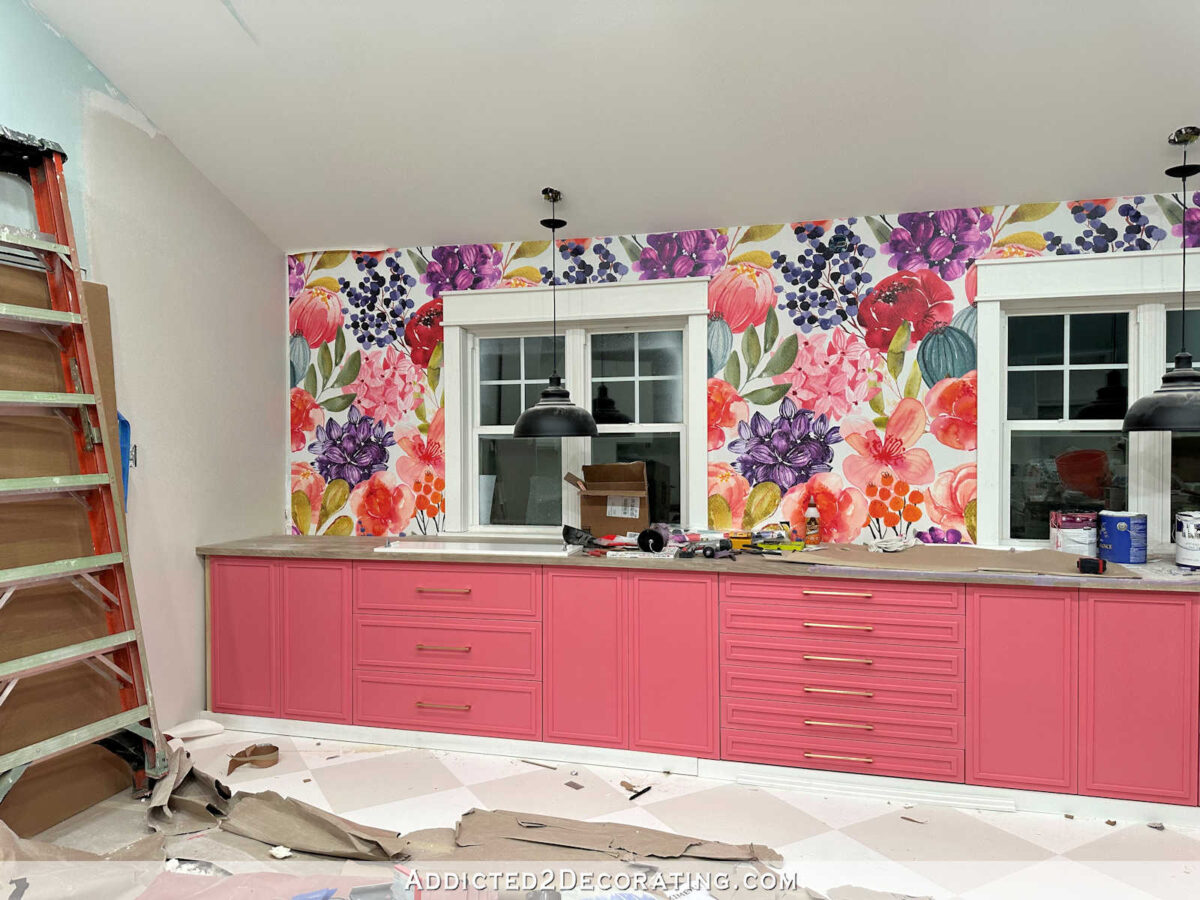
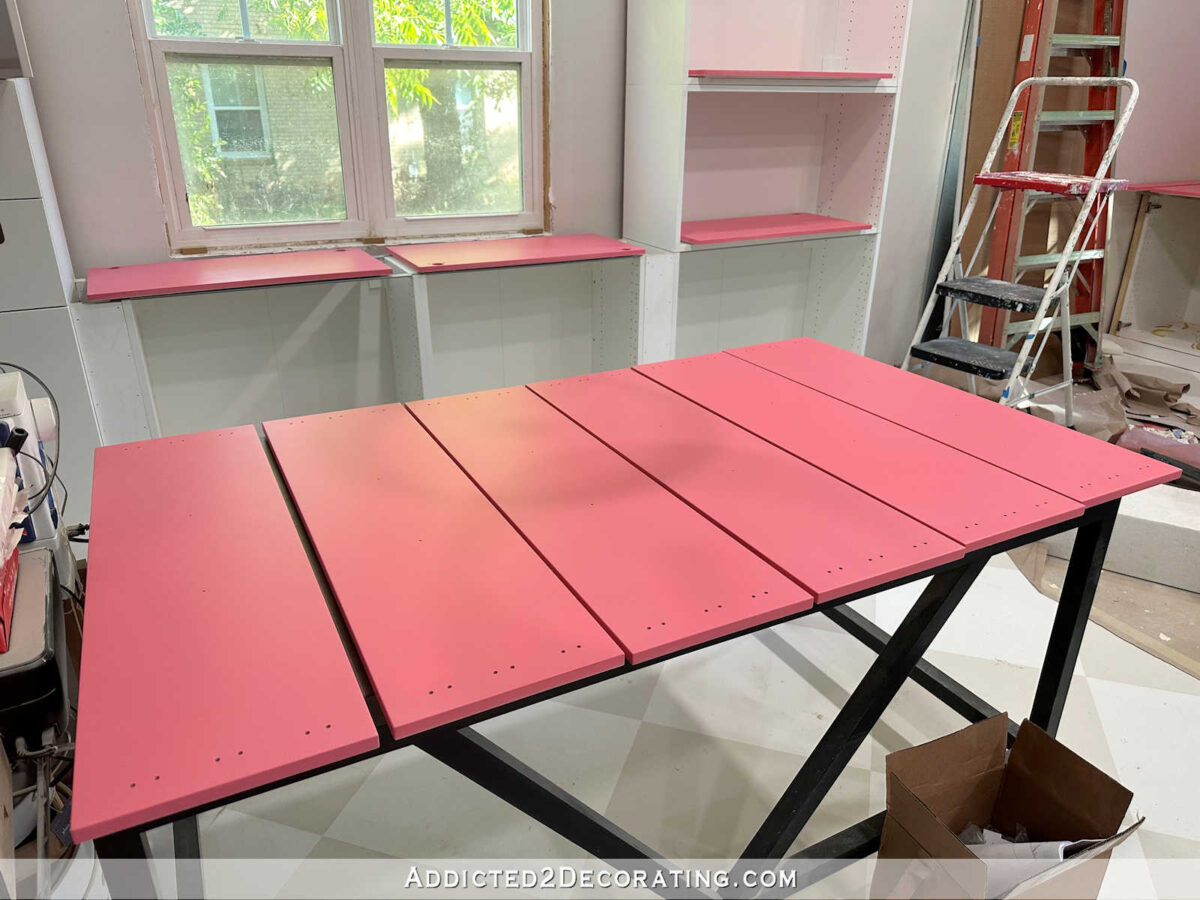
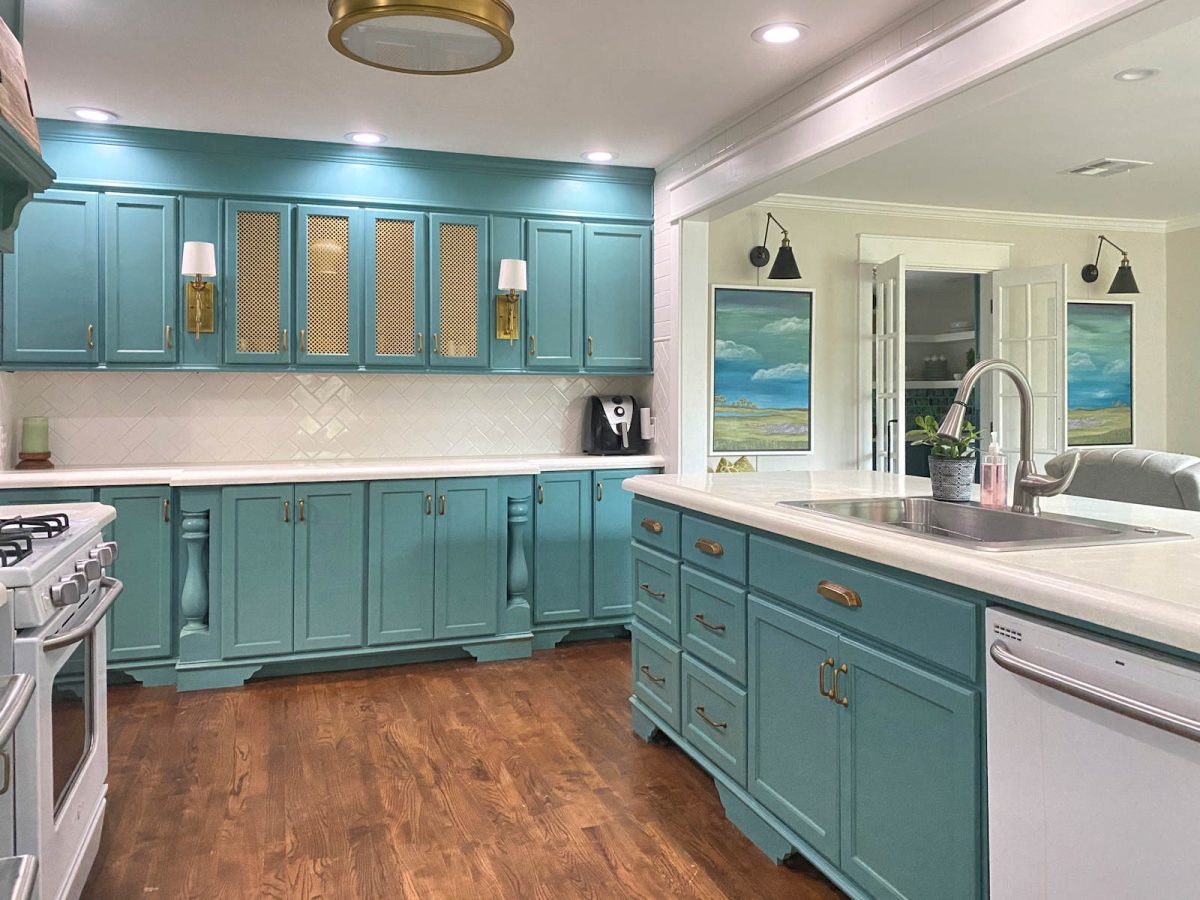
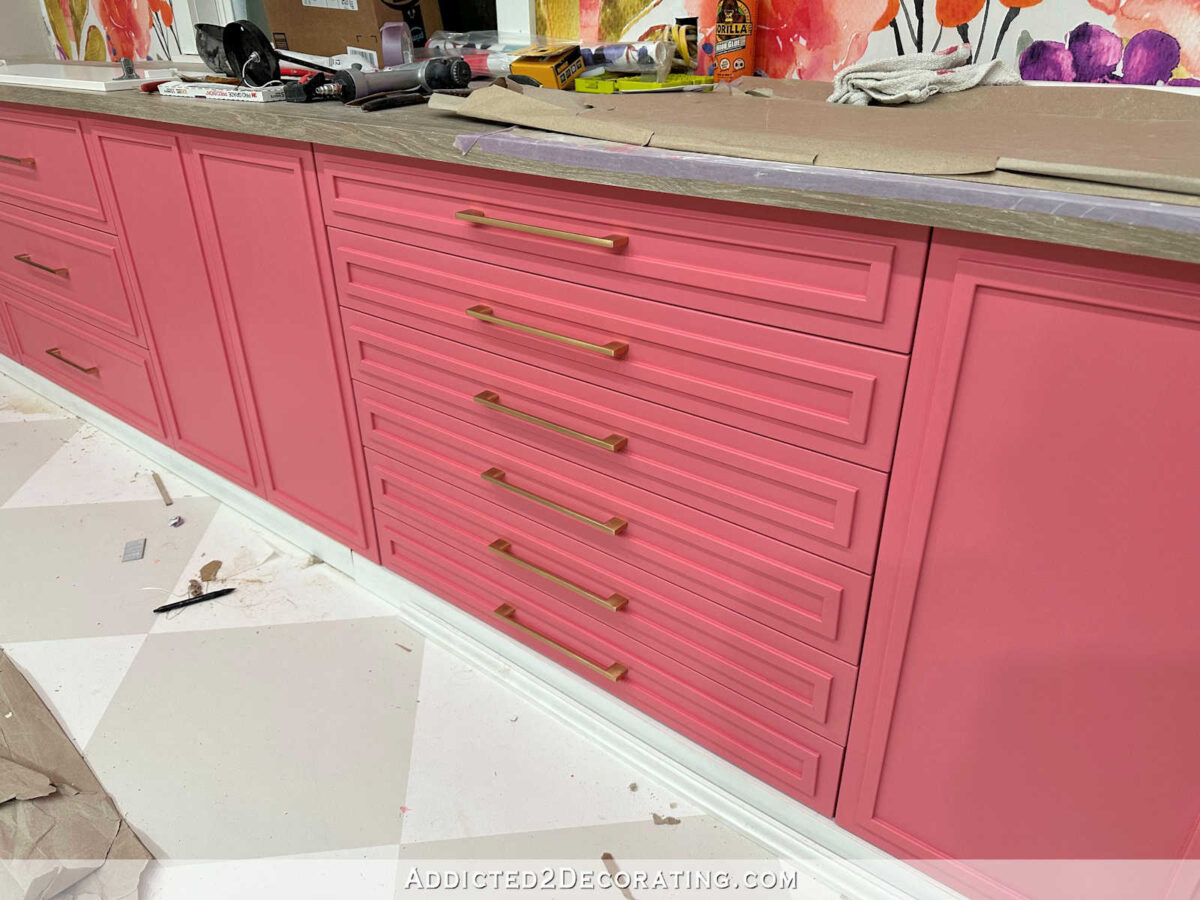
And I’m so glad I went for it! While I don’t have any section of cabinets completely finished yet (the one pictured below is the closest to being finished, but I still need to finish the toekick), these cabinets have far exceeded my expectations, not only in how they function (I am now a huge fan of IKEA Sektion cabinets!!), but also in how they look. I absolutely love my pink studio cabinets.
Why Paint IKEA Cabinets?
I know those of you who are familiar with IKEA cabinets and the amazing factory finish that comes on these cabinets are probably wondering, “Why in the world would you paint these in the first place?” I get it. It’s a valid question. And the simple reason is because I had my heart set on pink cabinets for my studio. And of course, no one has ready-to-assemble pink cabinets. Pink cabinets are always going to be a custom finish.
But let me tell you, I’ve never wished so much that I was a white cabinet kind of person! When I started opening up the IKEA boxes and seeing the amazing, durable factory finish on these doors and drawer fronts, the thought that I was going to ruin such a perfect finish kind of made me sad.
But…pink. The thought of pink cabinets kept me moving forward. 😀
And as it turns out, painting IKEA Sektion cabinets isn’t any different from painting any other cabinets. The process is all the same, so once I got past my initial nervousness of ruining the factory finish, the rest all felt very familiar to me. So let me show you step-by-step how I did it.
How To Paint IKEA Kitchen Cabinets
The cabinet doors and drawer fronts that I ordered are the Veddinge style, which are completely flat on the front and the back. If you keep these as is, they are the absolute easiest to paint, and all you need is a six-inch paint roller for smooth surfaces.
But of course, I can’t leave well enough alone, so I decided to add trim to the fronts of my doors and drawer fronts. This made the process a bit more challenging and required a sprayer for the fronts. But I’ll get to all of that in a minute.
Here is my basic process for painting these IKEA Sektion Veddinge doors and drawer fronts:
- Sand the fronts and backs to scuff up the factory finish, and remove the dust,
- Prime the front and back of each door and drawer front,
- Sand the primer on the backs of each door and drawer front to remove any imperfections, and remove the dust,
- Paint the backs of each door and drawer front with two coats of paint, sanding lightly between coats,
- Clear coat the backs of each door and drawer front with two coats of clear coat, sanding very lightly between coats,
- With the backs completely dry and finished, sand the primer on the fronts, and remove the dust,
- Paint the fronts with two coats of paint, sanding lightly between coats,
- Clear coat the fronts with two coats of clear coat, sanding very lightly between coats,
- Let the fronts dry thoroughly (preferably a full day, at least) and then install!
When you see the steps listed like that, the process doesn’t seem very intimidating, right? In fact, it seems pretty straightforward. But most people get bogged down in the details. Should I spray? What if I don’t have a place to spray? Can I brush? And if I brush, how do I get rid of brush stroke?
It can be a lot to think through, so let me show you exactly how I did it, what products I used, and give you some tips along the way.
Step 1 – Sand the factory finish
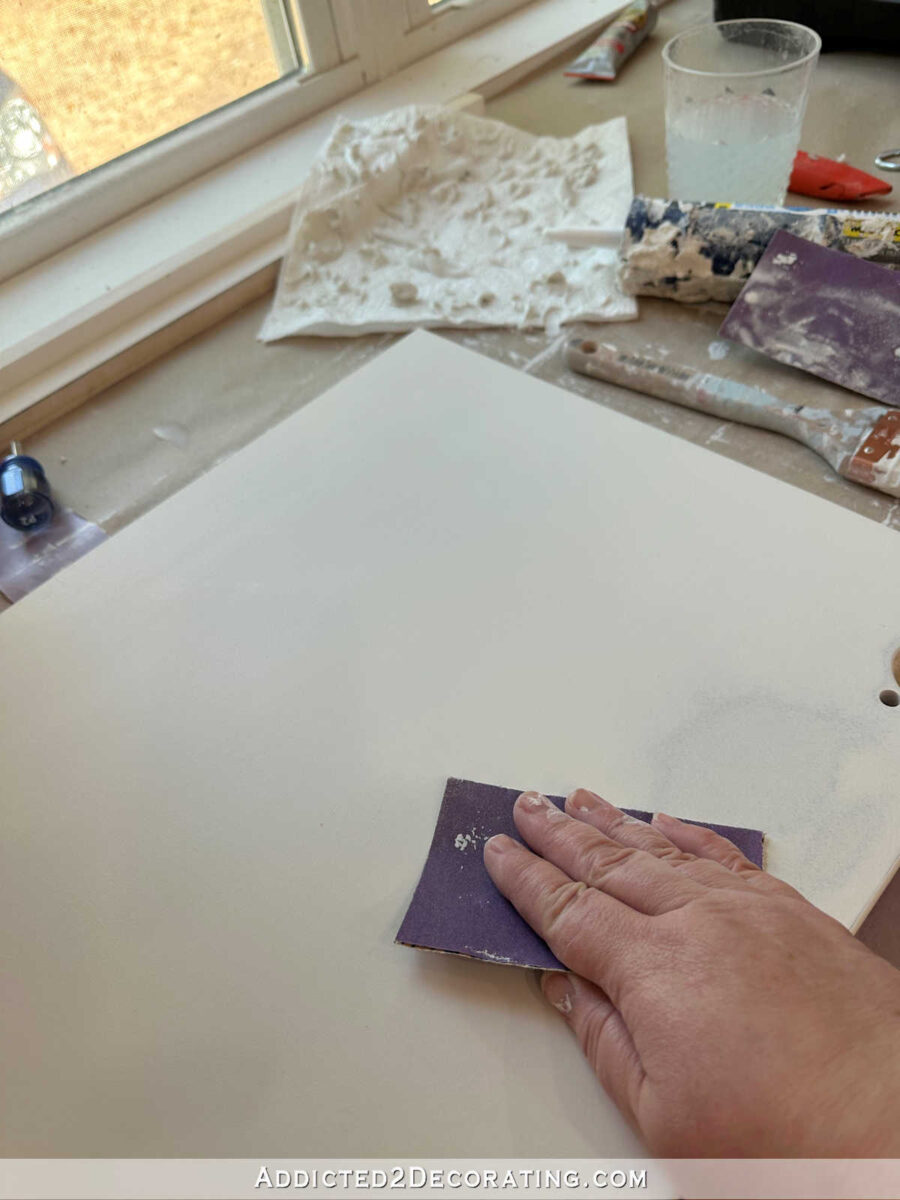
The first step was to sand the factory finish to give the surface some “tooth” for the primer and paint to stick to. I did this using my electric sander and 100-grit sanding discs. This IKEA factory finish is tough, and while I would generally start with 150-grit, I found that the tough IKEA factory finish required something more abrasive.

There’s no need to sand the entire finish off. In fact, what you see in the photo above was my very first one to sand, and I sanded it way more than necessary. The point is to remove the super shiny factory finish, but there’s no need to sand through the paint down to the bare material.
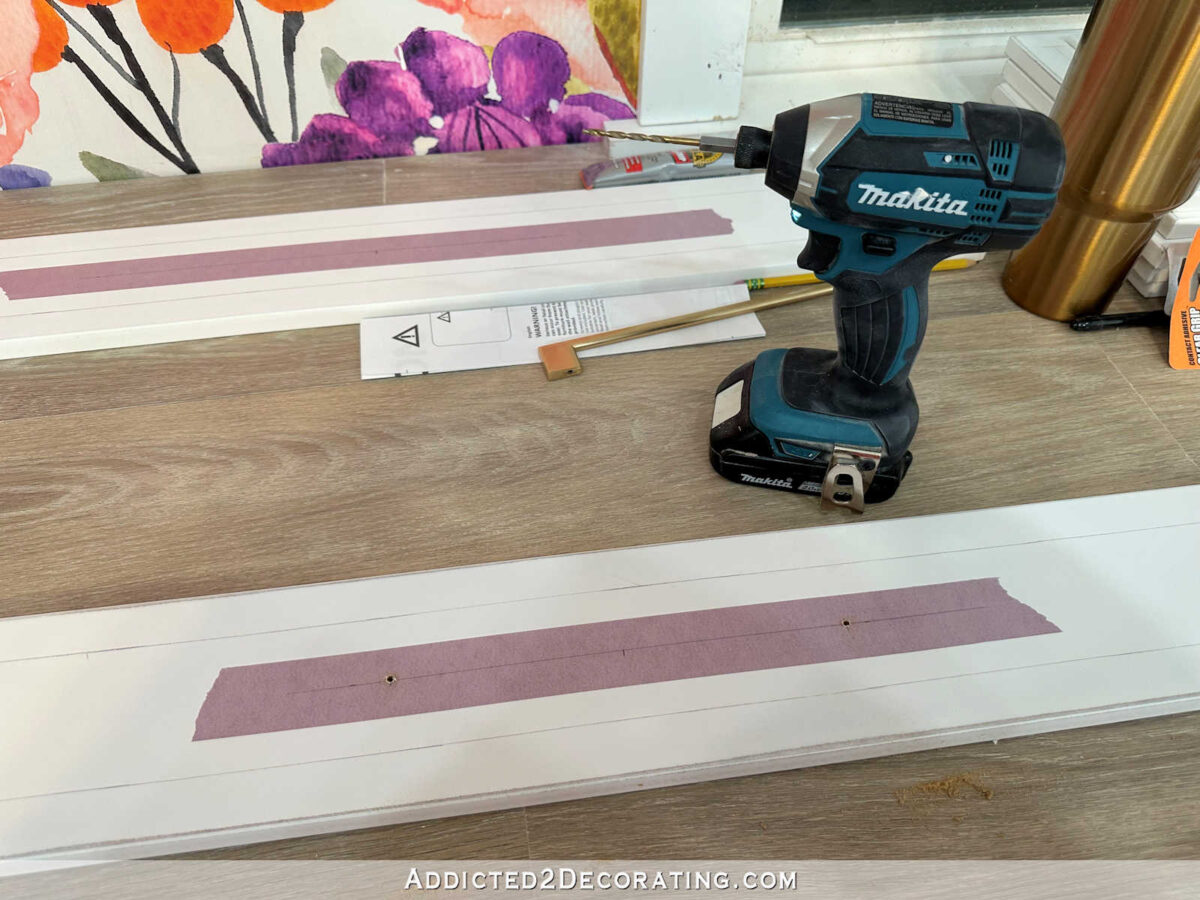
(Optional) Add trim
If you’re planning on adding trim to your doors and drawer fronts, now is the time to do it. The whole reason I bought the Veddinge door and drawers was so that I could do my own trim design and save money. But obviously, this is completely optional. I would guess that most people buy Veddinge fronts because they want that flat, no frills look.
(Optional) Drill holes for cabinet hardware
I always recommend that if you’re going to add drawer pulls or knobs to the cabinets, drill those holes before painting the cabinets. That way, if any mistakes are made, they can be fixed with some wood filler and sanding before you start priming and painting. There’s nothing more disheartening than drilling holes for hardware on freshly painted cabinet doors and making a mistake.
Step 2 – Prime the front and back of each door and drawer front
After all of that, I was finally ready to start on the priming. I used Zinsser BIN Shellac-Based Primer. This is great stuff, and I used it because it’s expensive and I happened to have it on hand from other projects I’ve done recently.
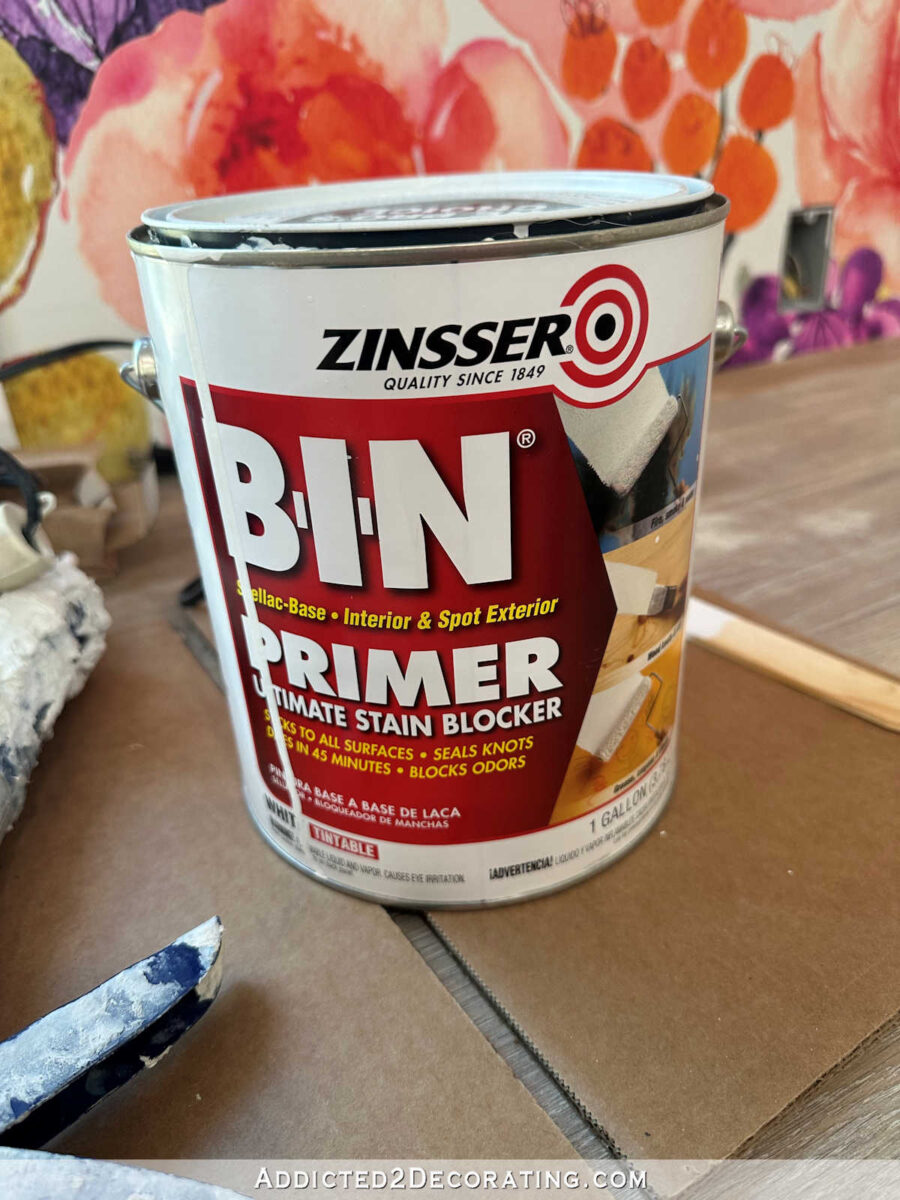
If I didn’t have this on hand, I would have opted for my other favorite Zinsser Oil-Based Cover Stain primer.

Both are fantastic products, but the oil-based is about half the price.
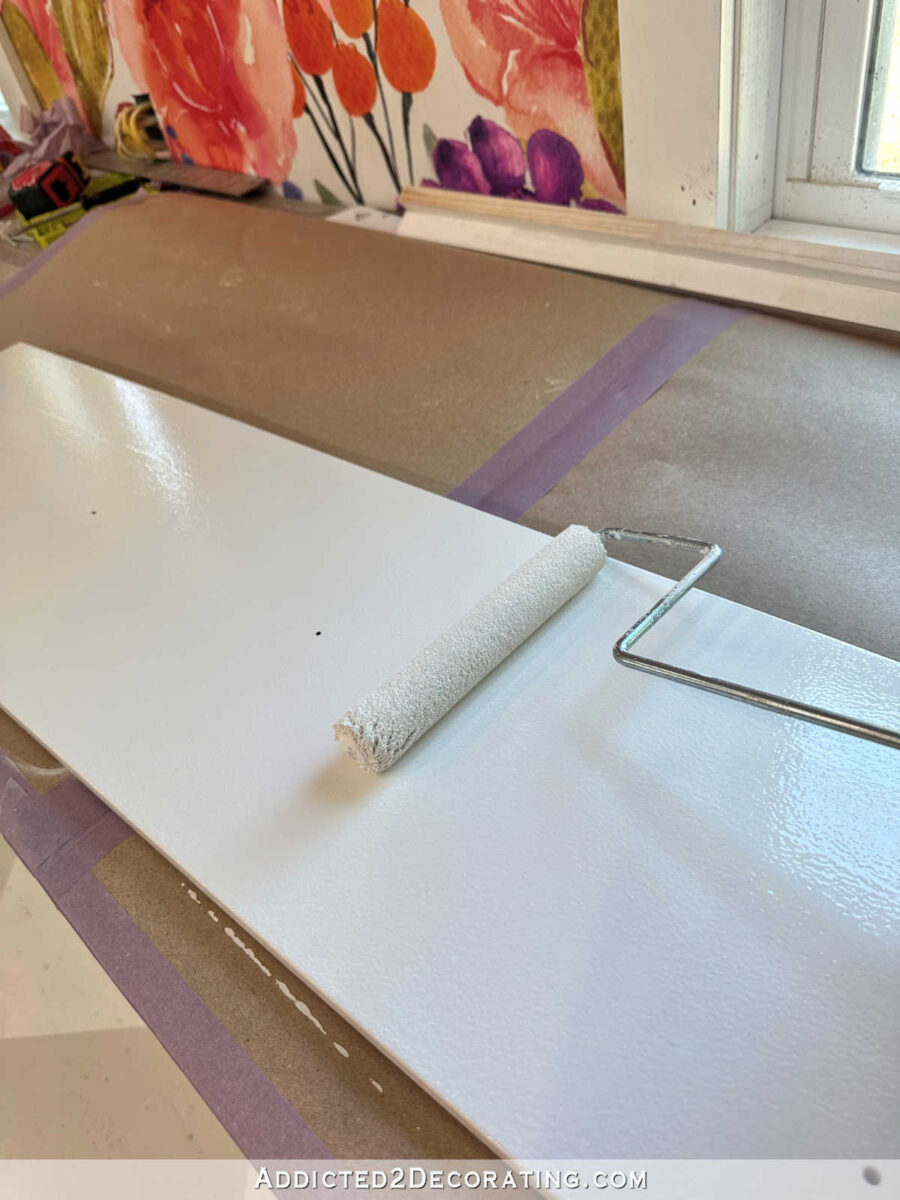
I applied the primer to the backs of the doors and drawer fronts using a 6-inch roller for smooth surfaces. Make sure the label on the roller says “smooth surfaces”! And my personal preference is the ones that actually look like miniature versions of rollers that you’d use for walls. I can’t stand those small foam rollers!
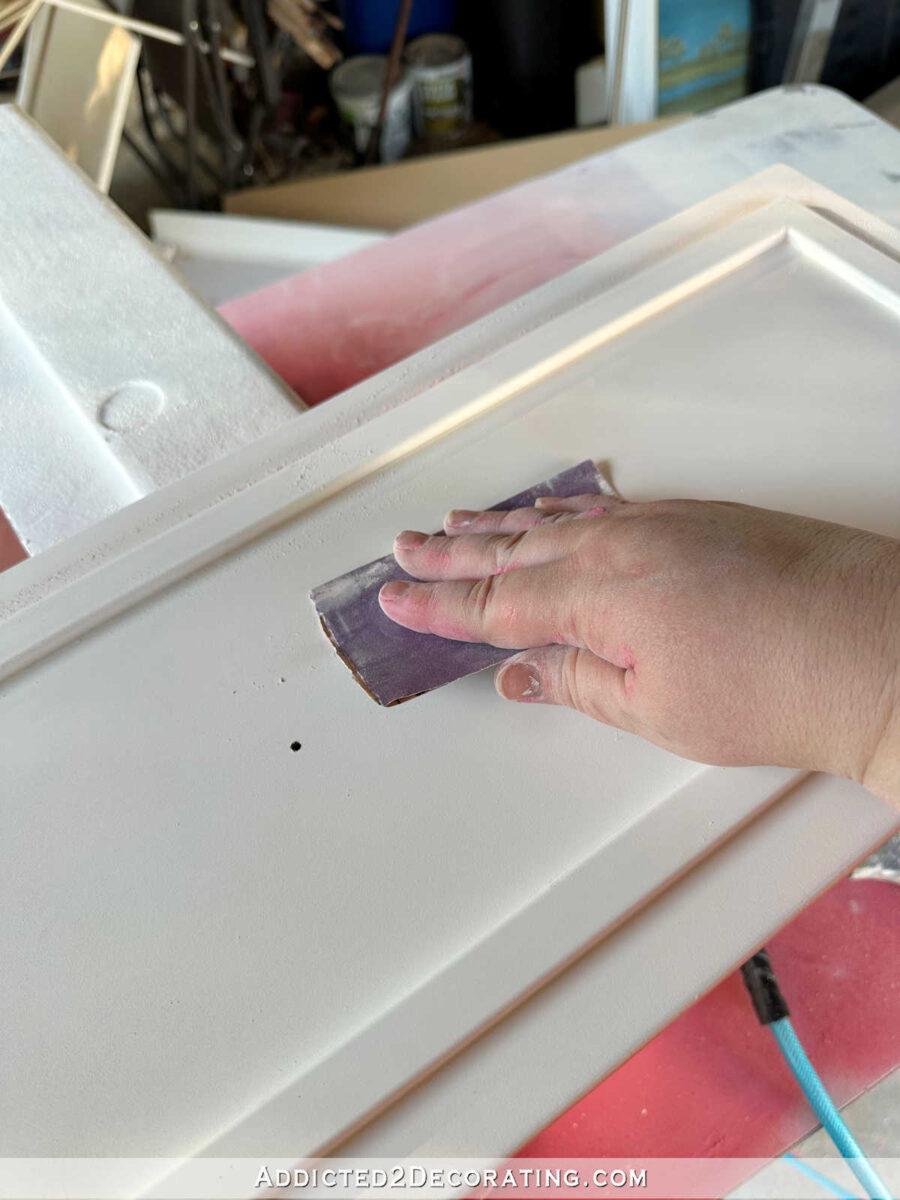
Step 3 – Sand the primer on the back of each door and drawer front
This primer dries pretty quickly to the touch, but I allowed it about two hours of dry time, and then I sanded it lightly with 220-grit sandpaper. This didn’t require much work at all. This was just a very quick sanding in order to remove any bubbles or imperfections that may have escaped my notice.
Because I made things difficult for myself by adding the trim to the fronts, I couldn’t use the roller to prime the fronts. Instead, I had to use my little paint sprayer, which means that the job had to be done outside. If I had left the fronts plain, I would have used a roller to prime the fronts as well. After spraying the fronts with primer, I let them dry, and then lightly sanded them just like I did the backs.
Step 4 – Paint the back of each door and drawer front
Next, it was time for paint. I used Behr Premium Plus paint, which is my favorite general purpose paint. And as long as I’m planning on using a clear coat (which I was on these cabinets), I feel comfortable using this general purpose paint on cabinets. If I weren’t planning on clear coating, I would have gone with a higher quality paint from either Benjamin Moore or Sherwin Williams made specifically for cabinets, like Benjamin Moore Advance.
But I love a clear coat finish for durability, so I stuck with Behr Premium Plus, and I added Floetrol in the amount specified on the instructions. Floetrol helps to eliminate brush strokes if you’re brushing a finish, and helps to eliminate that orange peel effect if you’re spraying or rolling a finish.
After the first coat, I gave it a quick sanding with 220-grit sandpaper.

And then I sprayed a second coat of paint on the backs.
Step 5 – Clear coat the back of each door and drawer front
I followed that with two coats of my absolute favorite clear coat — General Finishes High Performance Topcoat in a flat finish. I rolled on the first coat with a six-inch roller for smooth surfaces, and let it dry. Then I gave it a quick sanding with 400-grit sandpaper, and followed up with the second and final coat.

I left those to sit overnight to dry before starting on the fronts.
Step 6 – Sand the primed front of each door and drawer front
I did the fronts in the same sequence, starting with lightly sanding the primer with 220-grit sandpaper.
Step 7 – Paint the front of each door and drawer front
Next, I used my sprayer filled with my paint mixed with Floetrol, and sprayed the first coat, let it dry, and then gave it a light sanding with 150-grit sandpaper before spraying a second coat.
Unfortunately, I wasn’t able to spray the fronts of all of the doors and drawer fronts because of the weather. The weather looked beautiful, but on one of the days I was working on these, the temp was 109 degrees, with the “feel like” temp probably hovering around 112 or maybe even higher.
So when I tried to use my sprayer, which sprays a very fine mist of paint (which is what generally produces such a beautiful finish with that that orange peel look that heavier sprays often produce), the fine mist of paint was halfway dry by the time it left the sprayer and hit the door. That produced a powdery, rough finish instead of the beautiful, smooth finish I’m used to.
So that day, I had to finish up the painting process indoors with a brush. Again, had I not added trim to the fronts, the entire painting project could have been done quickly and easily with a small 6-inch roller for smooth surfaces. But because of the trim I added, I had to use a brush. It wasn’t a big deal, though! It was slower, for sure, but because I was using a brand new gallon of paint with Floetrol added, the finish came out beautifully.
And even on the ones I brushed, I did one coat, let it dry thoroughly, gave it a light sanding with 220-grid sandpaper, and then brushed on a second coat.
Step 8 – Clear coat the front of each door and drawer front
When the paint was fully dry (which doesn’t take long in our current 100+ degree weather), I sprayed the first coat of clear coat, let it dry, and then very lightly sanded with 400-grit sandpaper before spraying the second and final coat of clear finish.
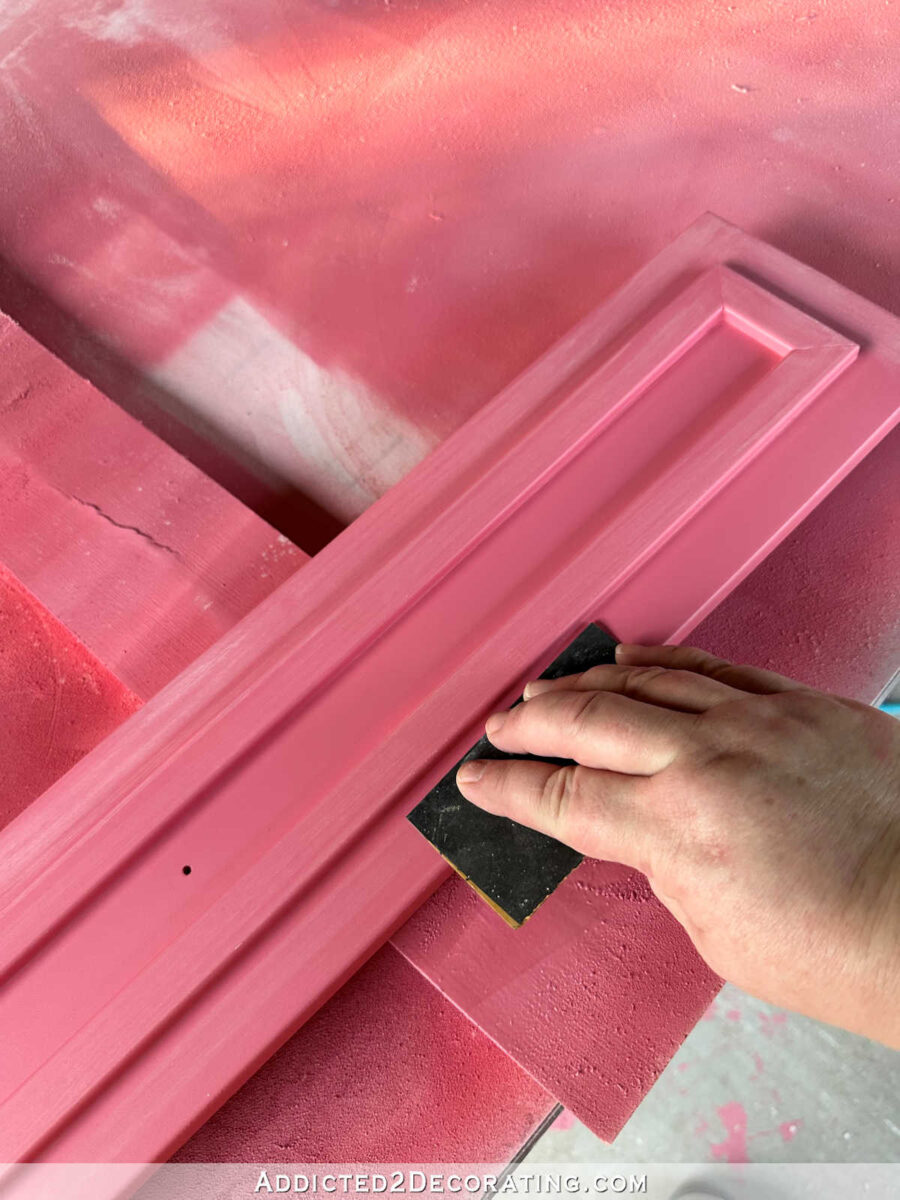
When sanding the first coat of clear finish, it is imperative that you use a very light hand, and avoid sanding on the corners/edges of the piece. The clear coat finish is always the thinnest on the corners and edges, and if you do much sanding at all in those areas, it’s almost guaranteed that you’ll sand through the paint finish and have to do a lot of touchups. I just avoid those altogether, and only sand the flat surfaces.
After sanding the first coat of clear coat, and before spraying the final clear coat (the coat that really matters), I use my air gun attachment on my air compressor to make sure all of the sanding debris has been removed thoroughly.
I take extra care with this step because the second and final coat of clear coat on the fronts of the doors and drawer fronts is the one that counts! This is the final finish that everyone will see, so I want it as perfect as possible.
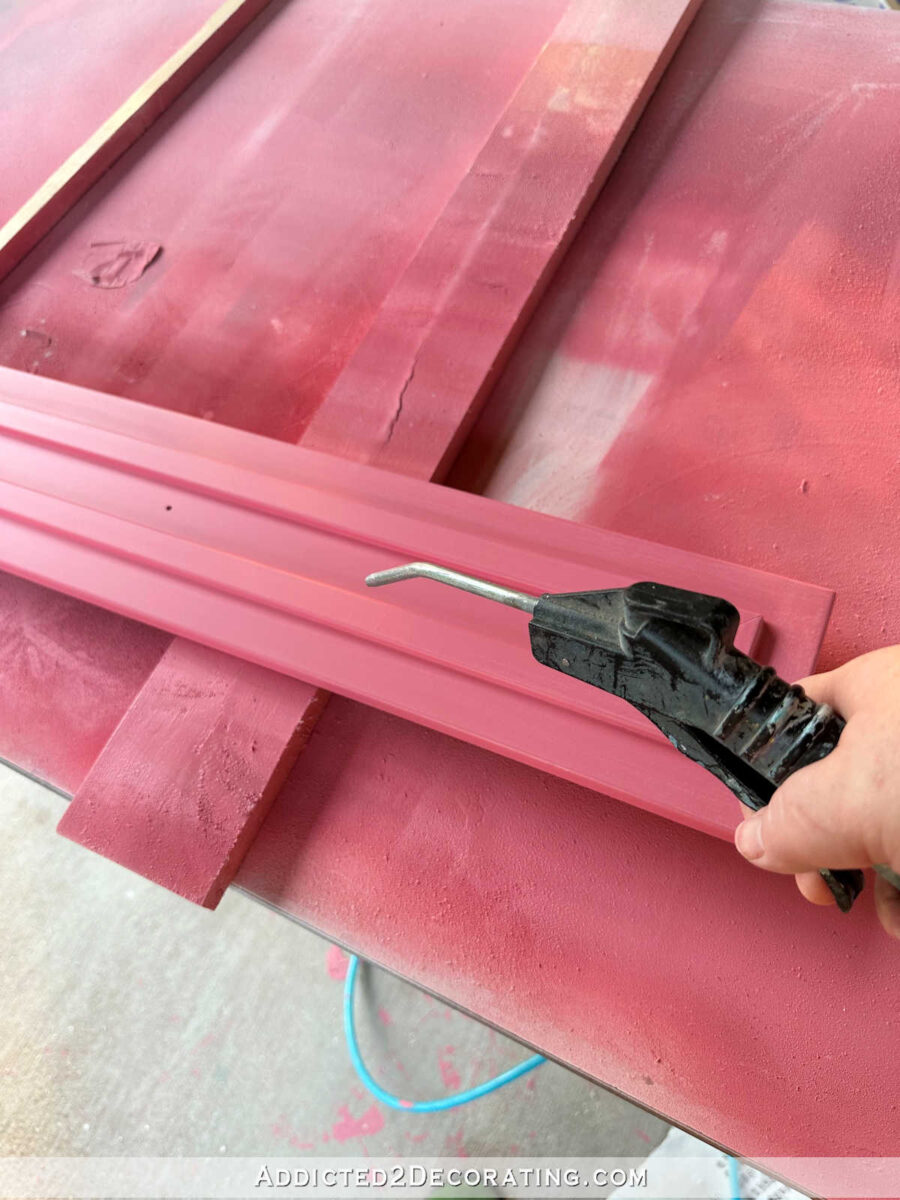
There may be times that sanding the first coat of clear coat may reveal a spot of primer.

In that case, I just dip my finger into the paint, and dab it onto the spot. You can also use a very small craft paint brush for this. Just make sure the touchup paint is very smooth, and let it dry thoroughly before spraying the final clear coat.
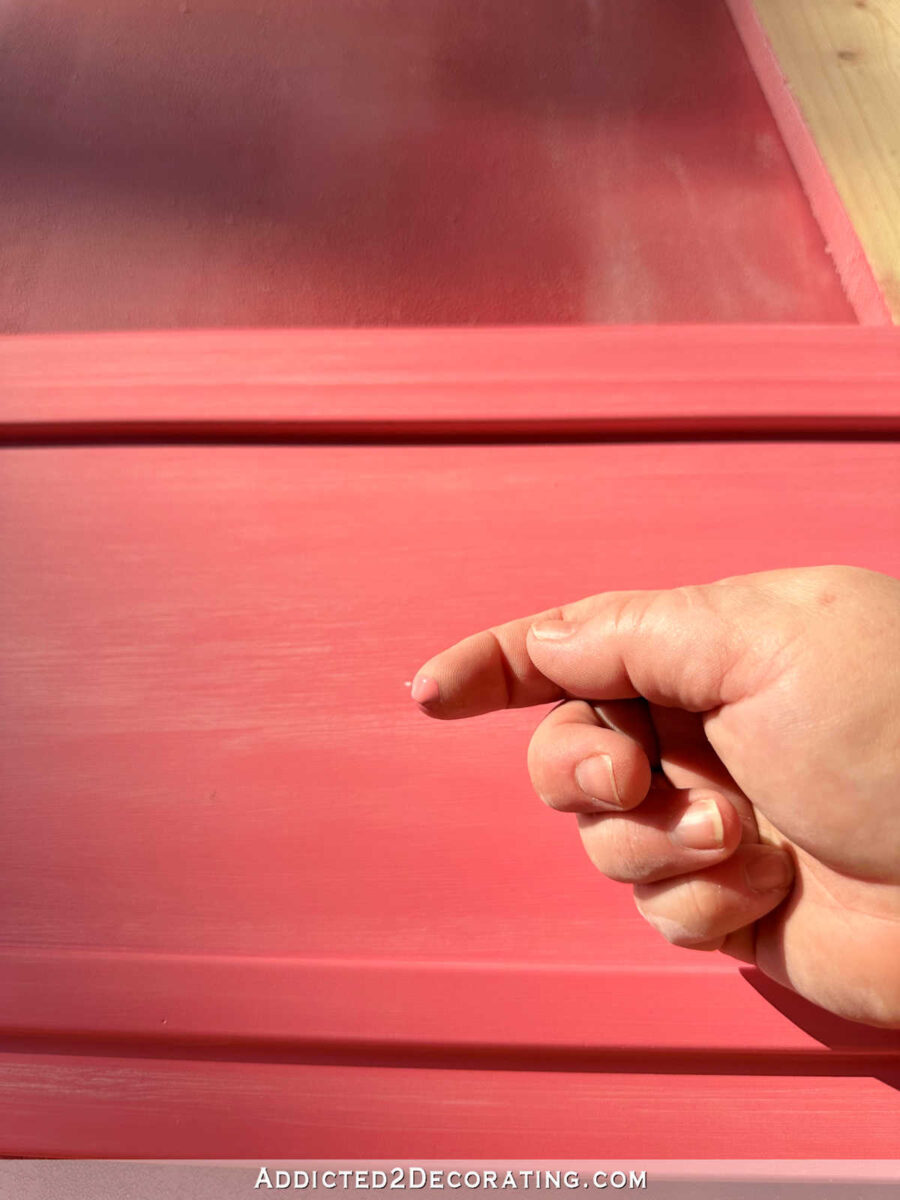
Here’s what that spot looked like when it was dry.

So after those tiny touch up areas are dry, you’re ready to spray the second coat of clear coat, and that’s it!
Step 9 – Let the fronts dry thoroughly and the install
It’s important not to rush this step. I know the temptation is the install the doors and drawer fronts as soon as they feel dry to the touch, but keep in mind that most finishes take 30 days to fully cure.

I’m not suggesting that you wait 30 days to install them. I’m way too impatient for that. But if I’ve used General Finishes (which dried harder and faster than just a painted finish), I like to give them at least 24 hours before messing with them. I’m too impatient to wait longer than that, but I’ve found that giving it a full day is enough for them to be durable enough to withstand the jostling and manhandling and even the occasional bump that happens when installing doors and drawer fronts.
So that’s it! It’s a long process, but it’s a process I’ve used for years now, and I’ve had so much success with lasting, durable finishes. While I don’t have IKEA cabinets in my kitchen, I did paint my my kitchen cabinets in 2017 using this process, and they still look fantastic today.
And I am very hard on surfaces. If you read my blog regularly, and follow along on my room remodels, you know how hard I am on my floors. 😀 Well, I’m not much better with cabinets or anything else, and my painted kitchen cabinets have held up beautifully to my abuse. After six years, I only have three tiny imperfections in the paint, and those are three chips about the size of half of a grain of cooked rice, and they’re all in areas that you’d expect (like the door just below the sink). Other than those three tiny chips, the paint is pretty perfect.
I know that painting cabinets can be daunting if you’ve never done it before. But the good thing about paint is that it can always be sanded if you make a mistake. If you accidentally stick your fingers into wet paint, just let it dry, sand it, and try again. If your finish doesn’t turn out as smooth as you want it, make sure it’s dry, sand it, and try again. It’s really not anything to be scared of.
A few final thoughts and tips:
First, it really doesn’t matter if you paint with a brush, a roller, or a sprayer. Don’t stress too much about that decision. You can get a beautiful finish with any of those tools. If all you have is a brush, I just highly recommend that you use Floetrol in a brand new quart or gallon of latex paint to get the best finish.
Don’t pull out an old gallon of paint that’s been sitting in your storage room for a year and think that you’re going to get a great finish on your cabinets. Brand new paint plus Floetrol has always been the winning combo for me, and it works beautifully even if you’re going to brush the paint on.
Also, the way in which I apply paint is dependent upon a few things. For example, if I were painting doors and drawer fronts that are completely flat on back and front, I would choose to use a roller on everything and on every step, from priming, painting, and clear coating.
If I’m painting doors and drawer fronts with trim or detail that makes a roller impractical, obviously my options would be a brush or sprayer. Which one I choose is dependent upon things like the weather (like our 109-degree weather than made spraying difficult) or the time of day (like if I only have time to paint at night when it’s dark outside). In those situations, I’ll opt to paint things with a brush so I can work.
So there’s really no correct answer. It’s all about whatever is convenient for the time of day, the weather on that particular day or season, and the style of cabinets. But all three methods of painting cabinets work just fine, with some being more efficient than others (obviously, brushing is going to be the slowest method), but all three will get you to the finish line. And as long as you take time to do each step (DON’T SKIP SANDING!!!), you can end up with a beautiful result.
One final tip…
Now there is one thing to keep in mind, and this is a big one. Always remember than all three methods of application will result in slightly different sheens on the finished product. I can’t explain it, but I’ve experienced this enough to know that even if you’re getting your paint out of one can throughout the entire project, if you brush one door and spray the next, there will be a difference in sheens.
This isn’t really important for every single step. As I mentioned above, during the painting step of the process, I sprayed some of the doors, and then had to brush others. That wasn’t a big deal since I was planning a clear topcoat. But it’s very important to keep in mind when doing the final coat on each door and drawer front.
So I warn you about that just to say that once you pick a method for that final coat for the door fronts and drawer fronts, stick with it. Don’t spray half of your cabinet fronts on a day with nice weather, and then brush or roll the rest because it’s raining the next day but you want to get the cabinets done. If you start off spraying the final coat on the fronts, spray all of them. If you start off rolling some, roll all of them. If you start off brushing some of them, brush all of them.
I used different painting methods on mine due to weather, but I sprayed the clear coats on every single door front and drawer front so that there would be no differences in sheen once they were all installed. And they look fantastic!
I think I’ve covered all of the steps that I used on this IKEA cabinet painting project. But if you have questions, please feel free to ask!

Addicted 2 Decorating is where I share my DIY and decorating journey as I remodel and decorate the 1948 fixer upper that my husband, Matt, and I bought in 2013. Matt has M.S. and is unable to do physical work, so I do the majority of the work on the house by myself. You can learn more about me here.