How to add decorative furniture feet to cabinet toe kicks with this DIY hack!
I’ve made so many small updates to our kitchen over the years, and this simple
DIY detail is one of my favorites!
I love the look of furniture feet on bathroom and kitchen cabinets — they add
a custom touch and make them look so much more expensive.
implemented it. When I added trim to our end cabinet panels, I knew it
would be a perfect time try it out! I was
left with a straight edge on the sides of the cabinets that made this even easier to implement.
You can also add these decorative “feet” where your cabinets meet a wall or
another cabinet.
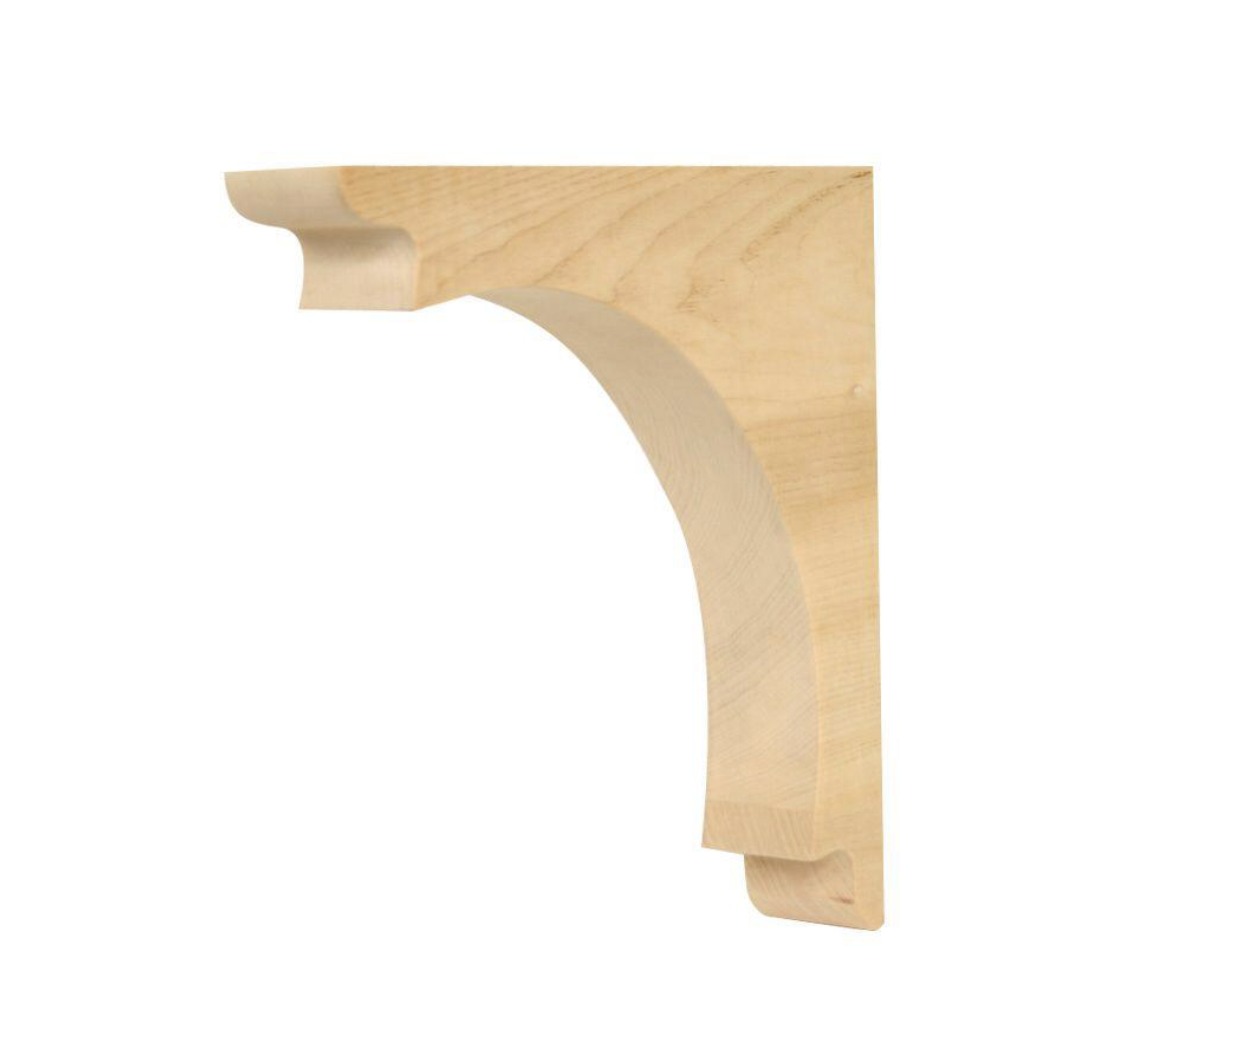
Instead of buying expensive feet for the cabinets, or jigsawing them out of
wood (the jigsaw is my least favorite tool…I avoid it at costs 😂), I made
some easy changes to these wood corbels:
This post may contain affiliate links for your convenience.
I may earn a small commission when you make a purchase through links.
You can find them at most hardware stores,
I found my corbels at Home Depot.
All I had to do was cut them down to the height of our kitchen cabinets. More
specifically, the height of the toe kick.
miter saw. Then I gave them a few coats of the cabinet paint color with light
sandings in between:
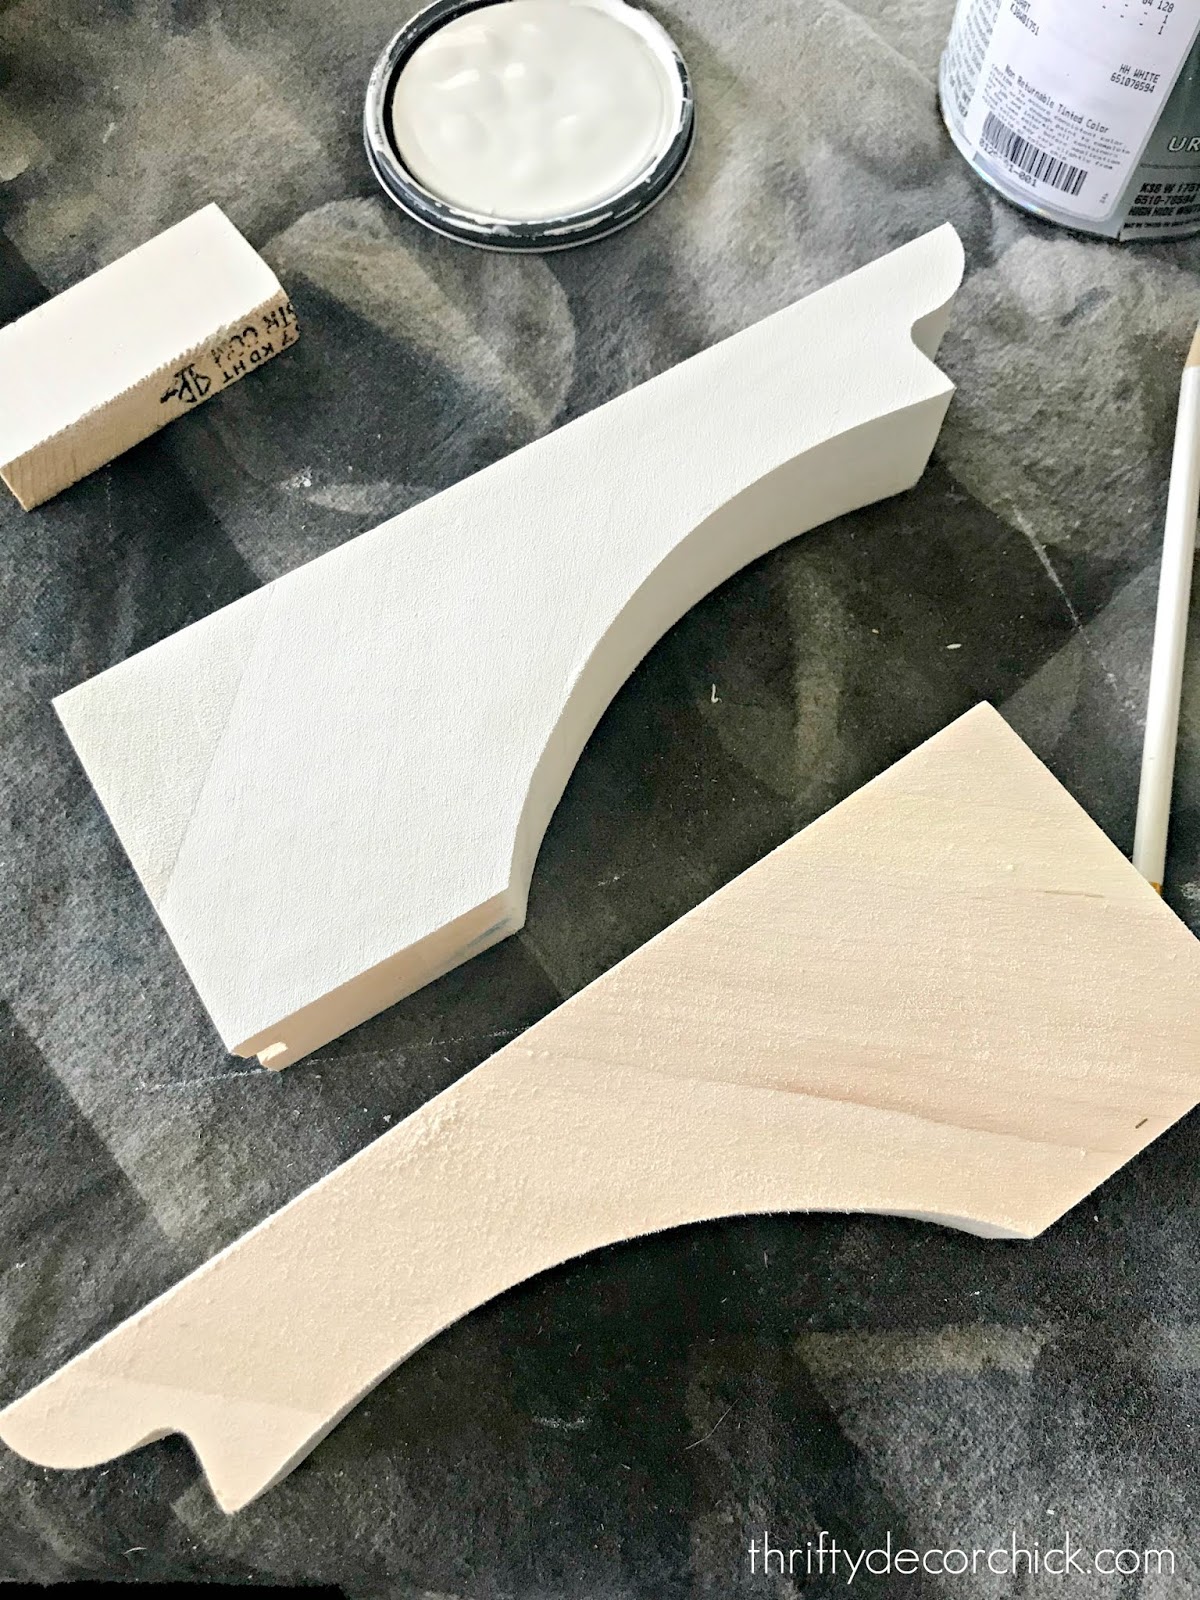
I took a door to the paint store to get a color matched to our
cabinets.
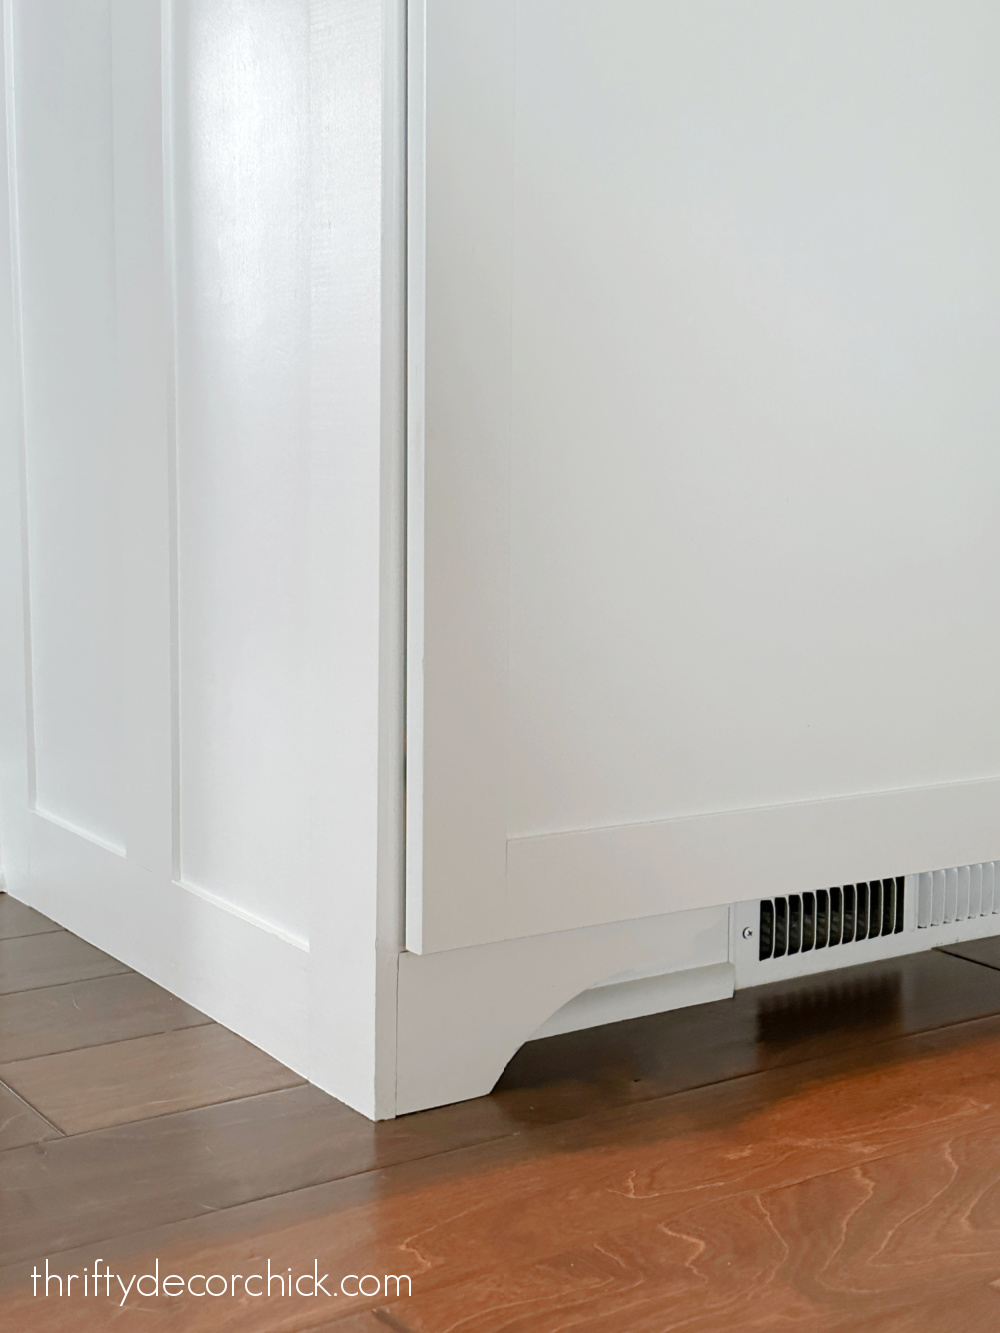
Do you see my vision here? They are now cabinet “feet!”
This could be be a super quick project — just painting and
attaching the corbels. But I did one extra step that added a little
time.
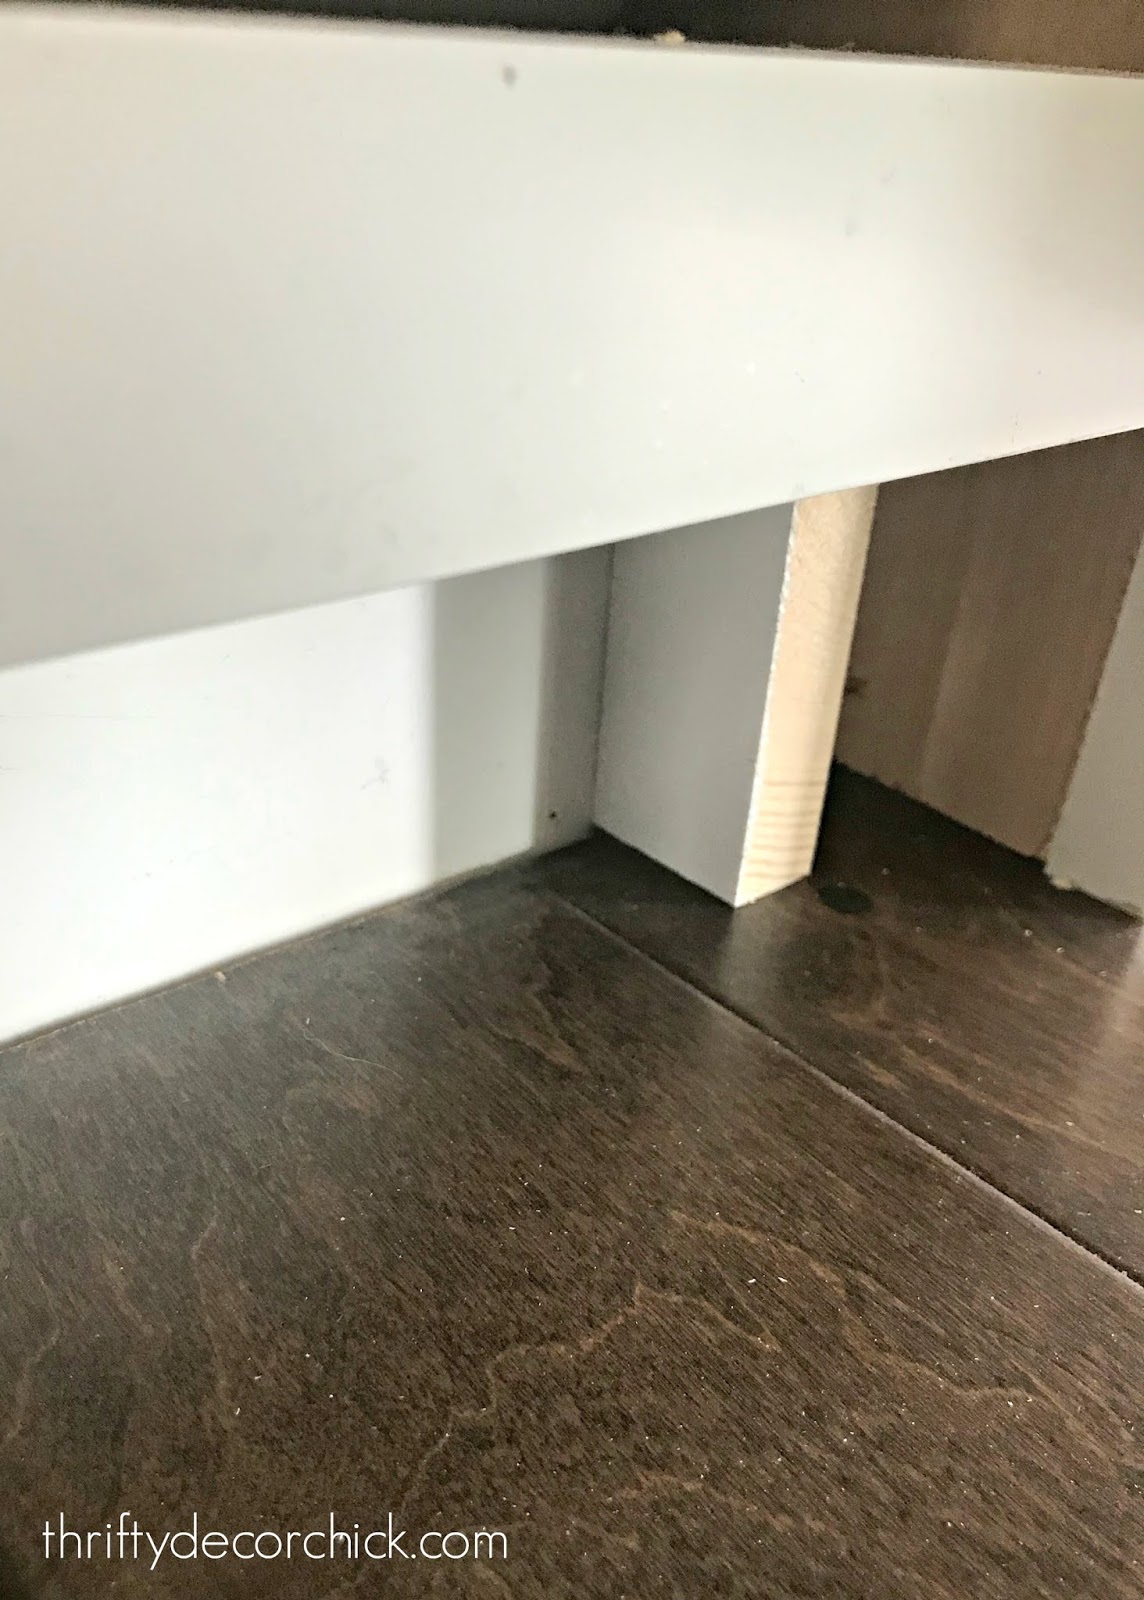
I wanted to make sure no crumbs could get back behind them (it would be
a pain to clean back there), so I added a block of wood that closes it
off.
I cut pieces of scrap wood the depth of the open space behind the
corbels, and then painted one side the cabinet color:
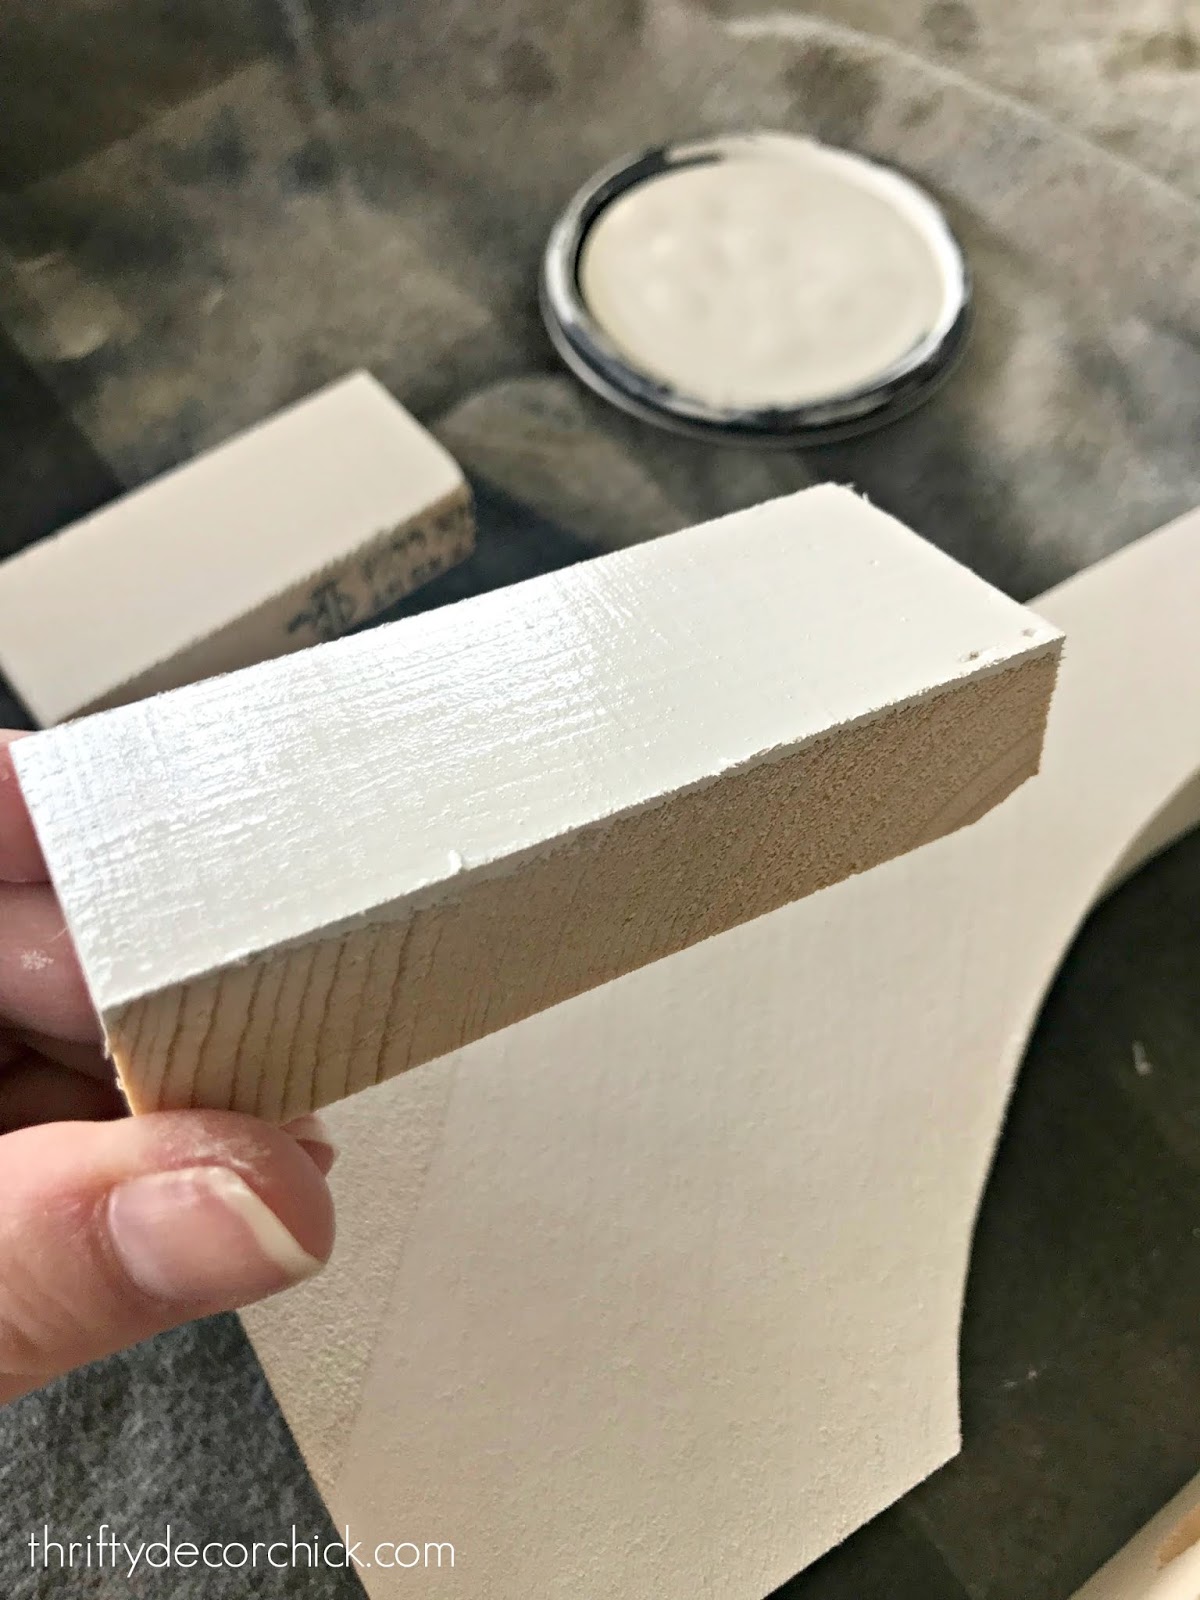
Then I attached it to the base of the cabinets with a nail gun:
Wood glue or Liquid Nails would work as well (as long as you have no
plan to remove them!). I checked the spacing before nailing it in —
making sure the depth of these back pieces were right on so the new feet
would meet up with the cabinets perfectly.
This little addition prevents crumbs from getting behind them, and it
allowed me to secure them even more by nailing into that from the
front.
Because I did this I had to cut down the quarter round, but it was
worth it!
To secure them I nailed from the side (where I could), from the top
through the cabinet (right up against the lip of the cabinet, so you can’t
even see the nail holes) and through that little stopper piece from the
front.
They aren’t going anywhere!:
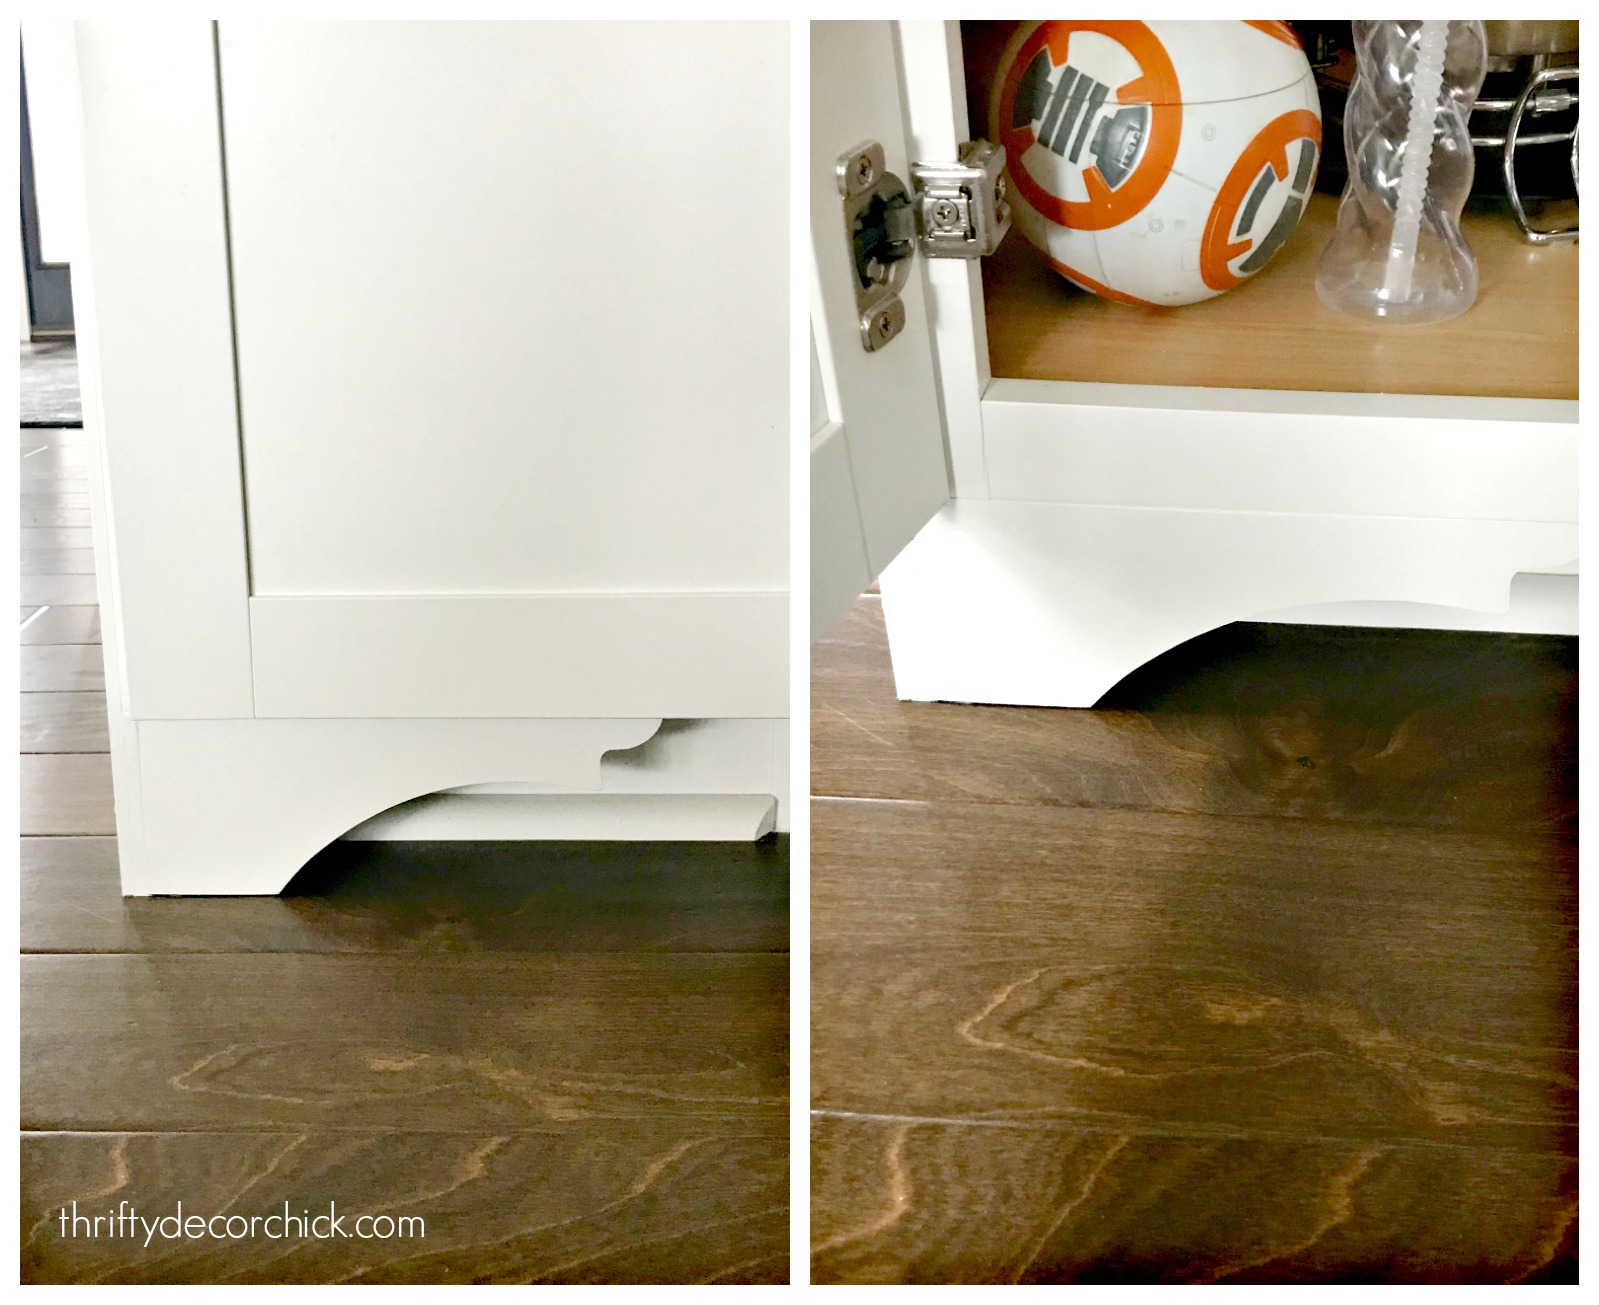
You can only see where they meet up with the cabinet if the doors are
open, so I didn’t add any decorative trim along the bottom to hide that
seam.
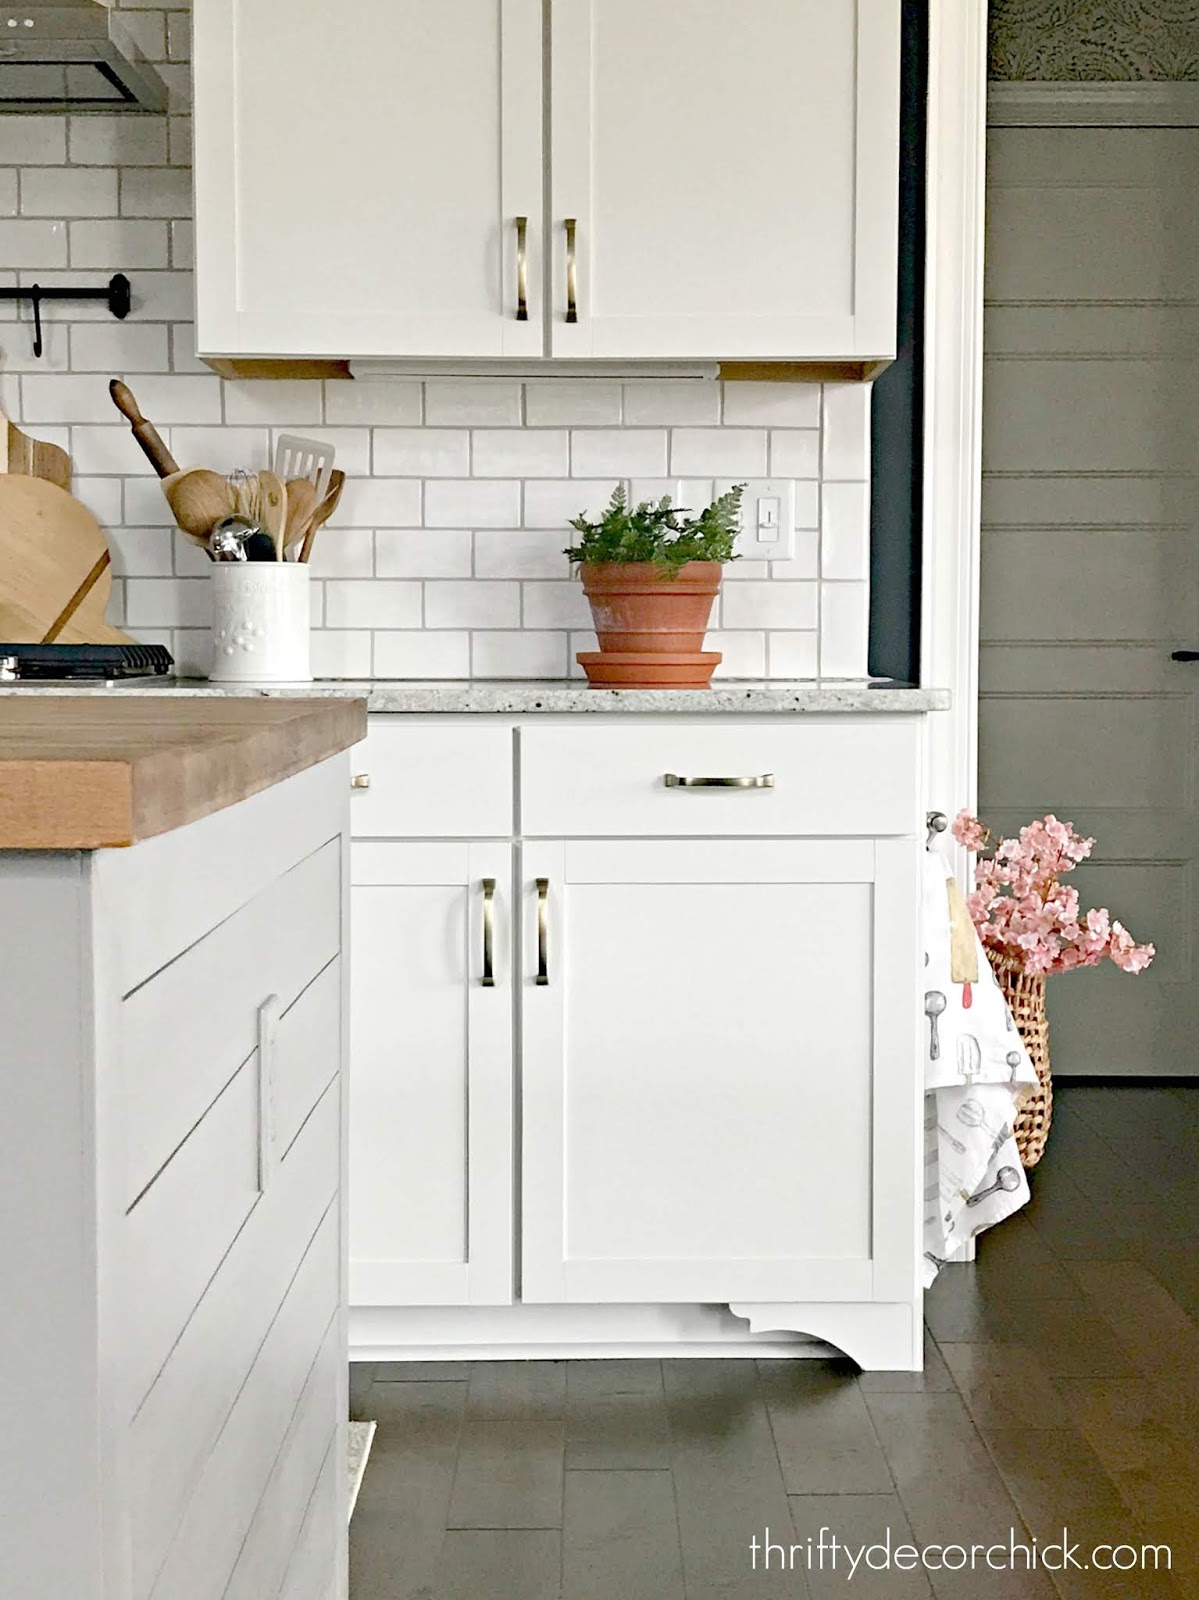
Here’s a view of the side of the cabinet (with the new trim) and the DIY
feet:

I’m thrilled with how they turned out! They add another detail to the
kitchen that doesn’t scream at you, but does enhance the whole look of the
space.
character to our kitchen!:
I originally planned to put a set under the cabinets where our stovetop
is, but I didn’t want it to get too busy. I may still do it, because I
love how they look!
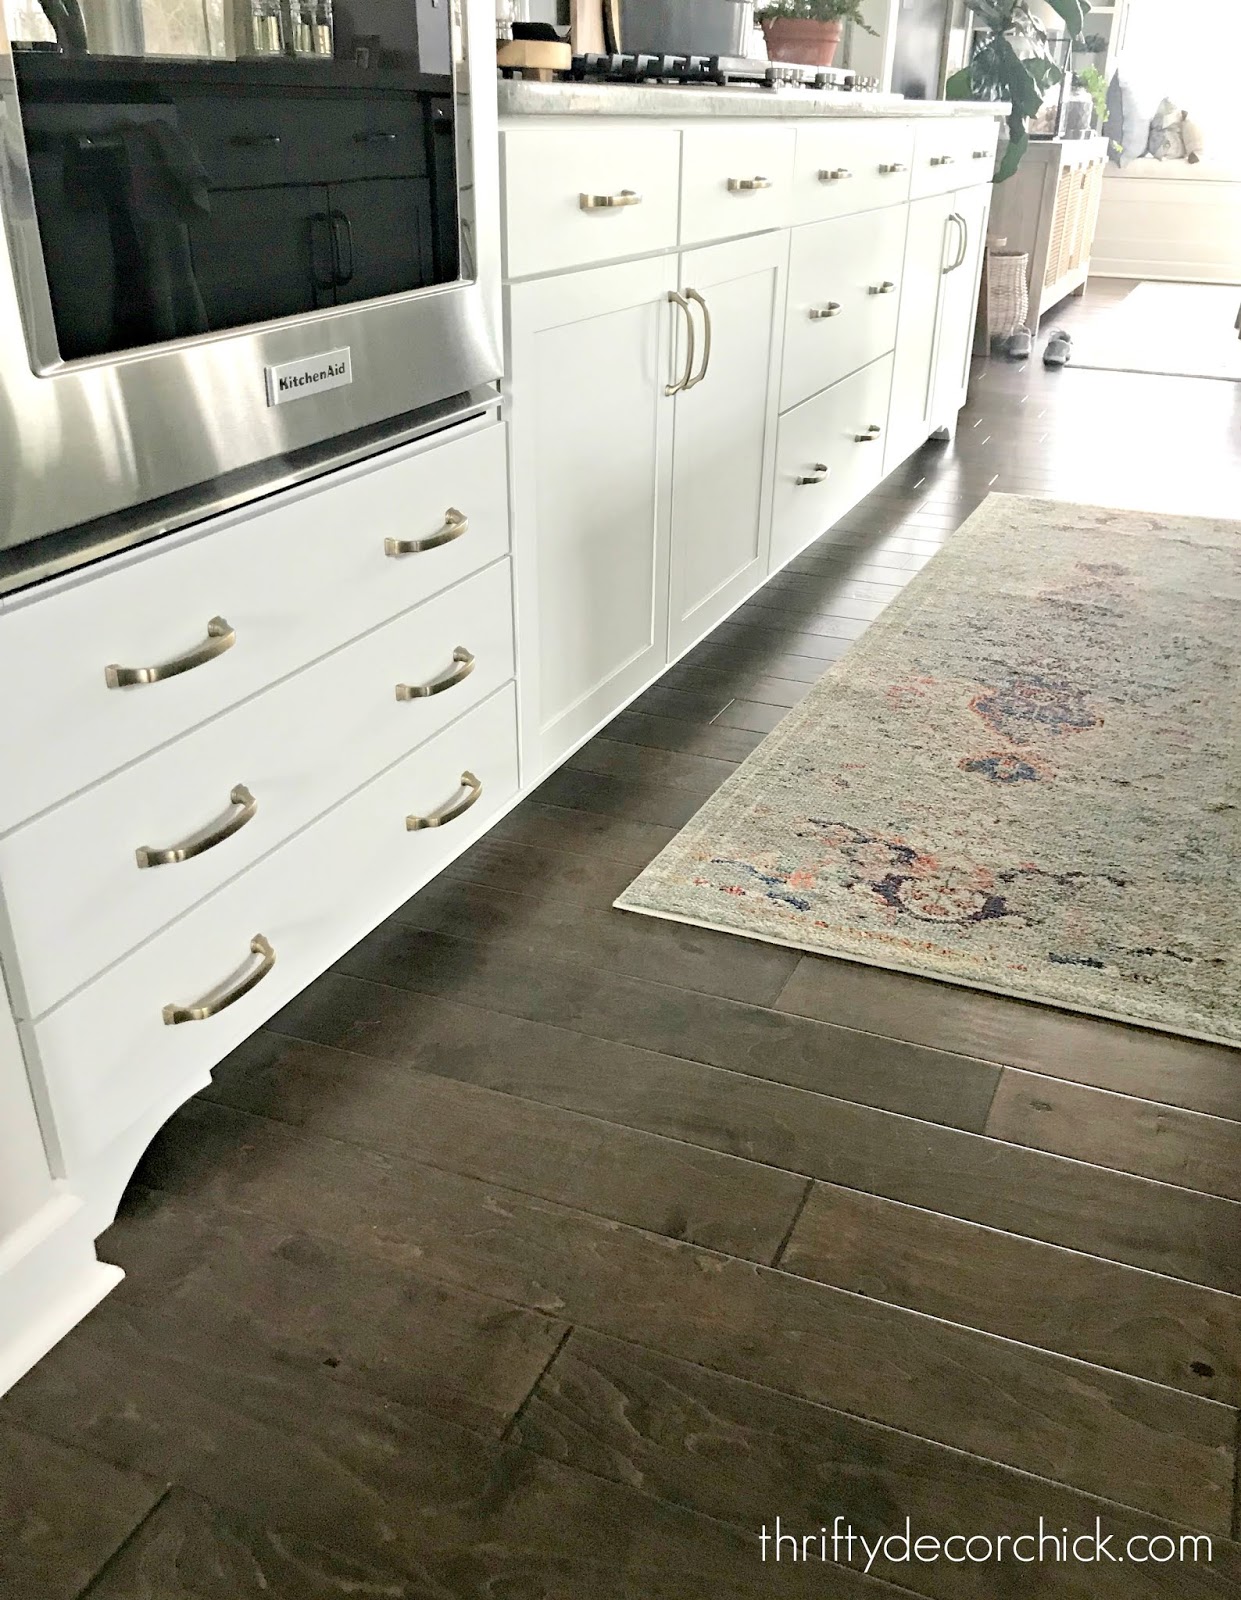
I researched a ton of kitchens that have cabinet feet and they range from
this simpler look like this (just at the ends) to each cabinet having a
set — so anything goes.
I’ve also added these feet to a few more spaces in our home — but I
gave them a more modern look by cutting off both detailed ends of
the corbels.


I only spent $40 on this project! If you are skilled with a jigsaw you
could make them for even cheaper. I preferred the thickness of these to
what I could do on my own. This method is MUCH quicker too.
You could still do this if you have the standard toe kick at the end of
your cabinets, but you’ll either have a space behind them you’d see from
the side or you’ll want to add a back to them that closes off that area,
if that makes sense.
If you have any questions let me know! I just love these DIY cabinet feet
and the softer touch it adds to our kitchen! There are a lot of hard lines
in here and I wanted to add some pretty, softer details.