Installing my {FIRST} countertops, sink, faucet and disposal!
Our basement kitchenette progress has been chugging right along! I’ve worked
on this room nonstop since late last fall, and I’m thrilled with how it has
come together!
For months I went through all the countertop options, and we waffled between
hard surface counters and something less expensive like laminate.
Granite or quartz would have been lovely, but sheesh…I had forgotten how
expensive they are. Plus I was feeling impatient, and knew it would take a
few weeks to make that happen.
Laminate comes in so many great color options now, but I prefer not to have
the short, rounded backsplash that most of them come with. (There are
options without that now though!)
But when I thought about the moody, cozy feeling I wanted for this space, I
knew my good ole go-to wood butcher block was what I wanted:

This post may contain affiliate links for
your convenience.
I may earn a small commission when you make a purchase through links.
Installing the butcher block countertops.
birch butcher block counters
and had them delivered to our house. I texted the contractor guys we use for
some larger projects to see about help with the installation, but they were
booked up for weeks.
I was dying to get this little kitchen functioning with a sink, so I decided
to tackle them on my own. I used my circular saw to cut each piece down to
size, and then we carried them down so I could set them in place.
pre stain wood conditioner, stained them with my favorite Provincial stain (also Minwax) and then
applied one coat of Tung oil.

The wood counters turned out so beautiful! We LOVE the warmth of the
butcher block in combination with the light gray cabinets:

When I was sure they were ready and in place, I attached the countertops
from underneath with screws. The top brackets on the cabinets have a hole
for the screws, so it makes everything super secure.
Make sure your screws are long enough to go into your counter, but not too
long they’ll come through the top!
I’ve cut down and installed smaller sections of countertop many times, but
never this many and at this size. This was a HUGE job, but it went quicker
than I thought it would.
Installing the sink and faucet.
YAY! The countertops were cut, treated and installed. It was finally time to
get the sink and faucet in!
Yet again, my impatience fuels my determination. I did a TON of
research on how to cut counters and install a sink, as well as installing a
faucet and disposal…none of which I have ever attempted.
We’ve had black quartz kitchen sinks for the nearly ten years now, and I
absolutely love them. I love the touch of black and that they are so easy to
keep clean.

I laid the sink face down on the counters and made sure there was two inches
of space across the front:

Then traced the sink onto the butcher block.
But I had to retrace when I remembered that I wanted to use painter’s tape
to cut down on any splintering as I was cutting. 🙂
After laying down the tape, I used a larger bit at the corners and then my
jigsaw to cut the sink shape out:

This is important — make sure to secure a couple scrap pieces of wood
across the part you’re removing so it doesn’t crash down to the floor as you
cut. It’s heavy!:

After cleaning up, we checked to make sure the sink fit, then applied a bead
of silicon around the lip of the sink and dropped it into the
countertop.
If at all possible, cut the hole for your sink outside or in a garage!
It’s MESSY!
I was on a roll! It was time to attempt another first…installing a faucet
from scratch.
I say from scratch because this spot was only roughed in when we built our
home, so the hot and cold shut off valves and plumbing pipes weren’t
installed:

Make sure you turn off the water in your home before cutting the ends off
of those tubes or doing any plumbing!
We wanted a garbage disposal down here as well, so went through the same
process of researching the how-to.
There was a lot of pausing and playing on these videos as I went through
both processes. But they worked and NOTHING leaked!
Over a couple weeks I installed the countertops, sink, plumbing, faucet and
disposal all by myself! There aren’t many DIY projects I haven’t attempted,
but the plumbing was intimidating. Now that I’ve done all of this, changing
out a faucet will be easy. 🙂
Finally, the kitchenette was starting to come together. I’ve been dreaming
of having this space for years!
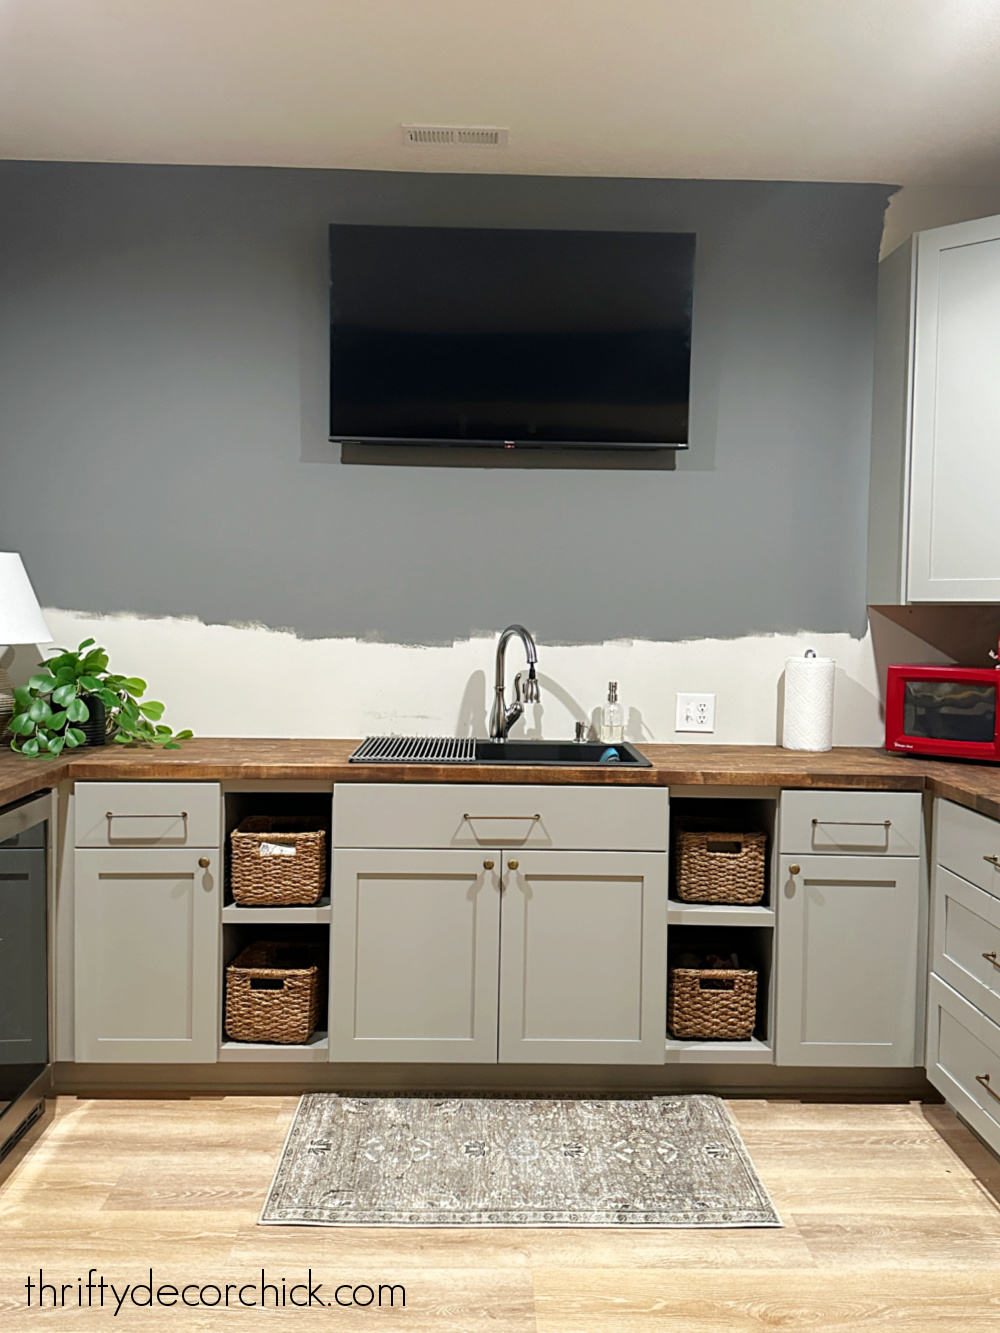
Here’s how it looked before I started on the backsplash:
I only painted the wall down to where the tile was going. (The color is
Westchester Gray, same as the rest of the basement.)
Next up, time to start the fun stuff! I can’t wait to show you how this
space looks now.
My goal is to make the TV blend into the wall a little bit. (I wouldn’t have
picked one in here, but my family insisted and now I really do like it.) And
also even out the weight of the room: