It just makes sense to keep a room that keeps your life on track — like the laundry room — looking and feeling organized. The laundry room is a room you should want to spend time in (even if it’s not exactly fun!) because, after all, your laundry isn’t going to clean itself.
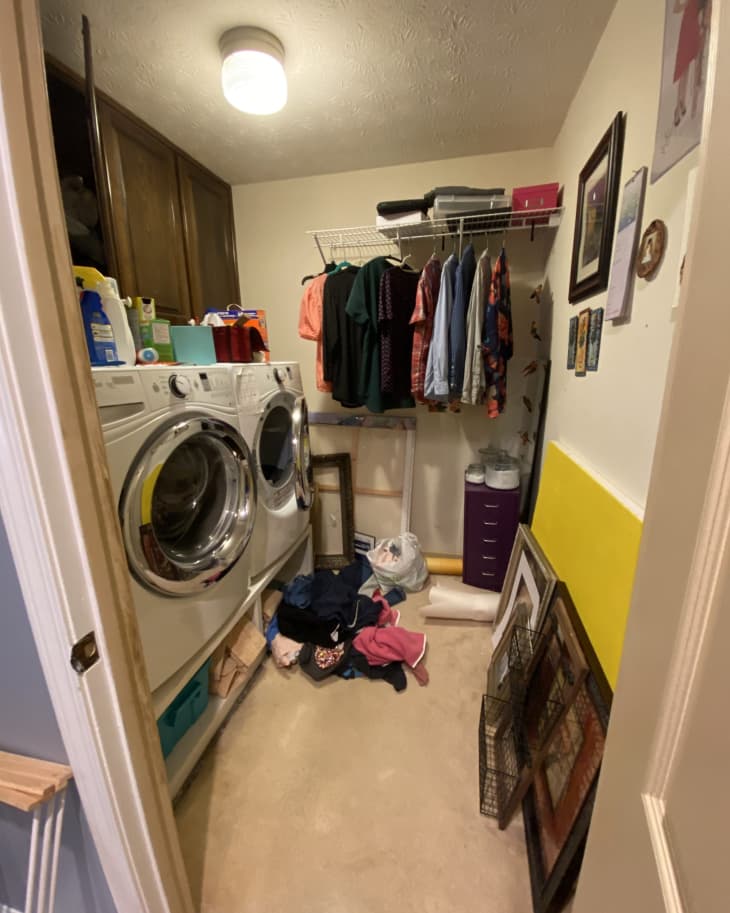
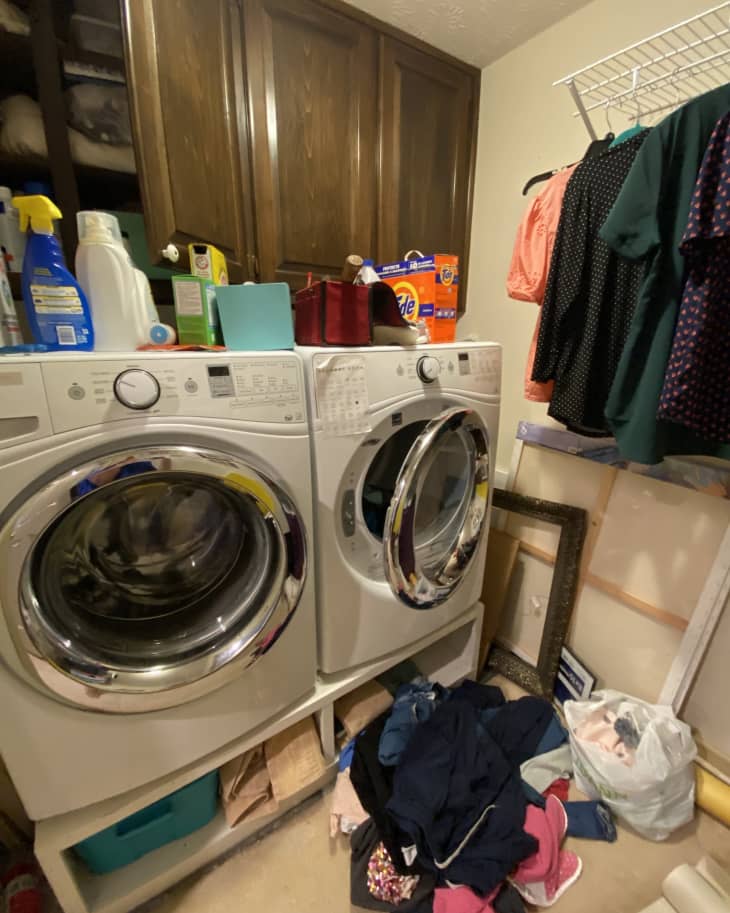
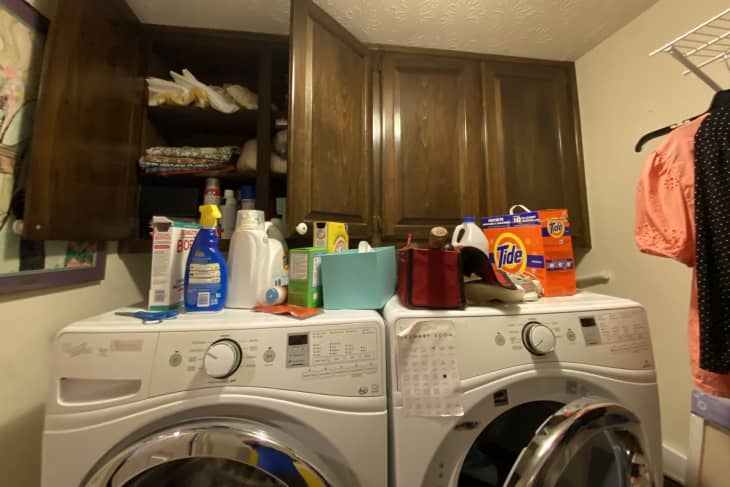
DIY fan Dana Lee (@djl3262) gave her family home’s “cluttered” laundry room some much-needed TLC. Dana’s house was built in the early ’80s, and the laundry room hadn’t gotten much attention since then.
“I loved that it was a second-floor laundry room, so no stairs to climb with baskets of overflowing laundry to contend with,” she says. “But otherwise, the walls were a dirty off-white, and the ceiling had a horrible, pointy, ‘knock down’ texture. Think: popcorn ceiling but swirly with sharp points — it looked like dirty cobwebs to me.”
The project started with a ceiling upgrade.
To kickstart the project, Dana drywalled the ceiling. “I took off the ceiling texture myself and borrowed drywall tools from a neighbor (trowel, trough, sanders … ) to apply a lovely skim coat,” she recalls.” That was by far the hardest and dustiest part of the process, but I’m thrilled with the result.”
Dana initially asked a professional for a quote for the room, and it was $300. Her version cost about $30 total for drywall compound and sanding materials. “We knew he’d do good work — he had similarly improved the ceilings for most of the other rooms in the house — but because it was such a small room, I figured I could give it a try and save us a little bit of money,” she says. “I’m happy with the result, but in the end I might have been just as happy having him do it and sparing my back. You have to bend back while on a ladder a lot, and it’s hot and sweaty up there by those ceilings.”
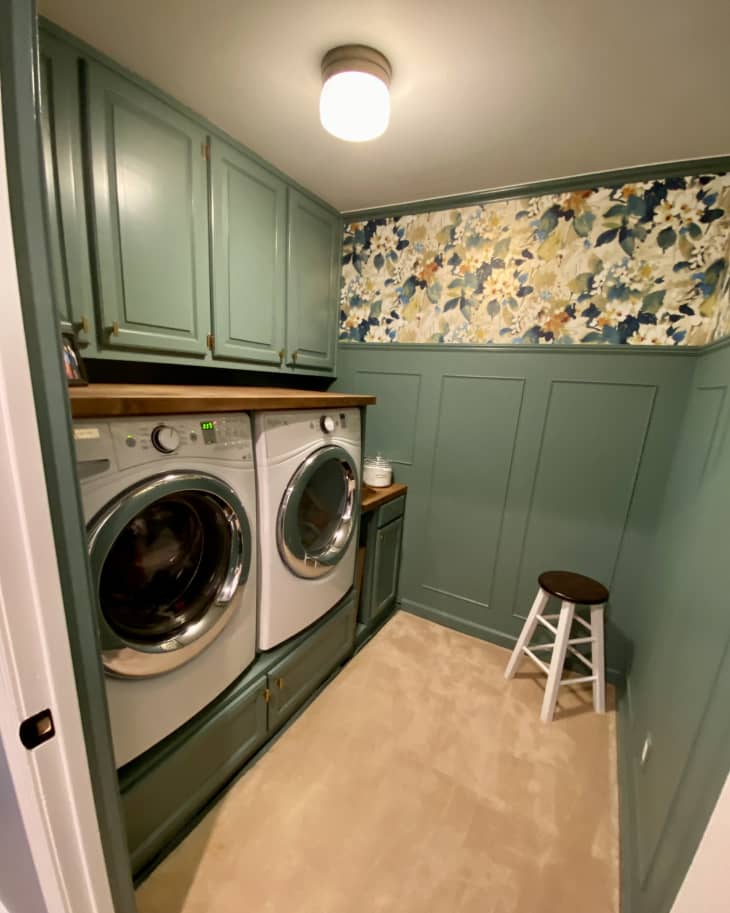
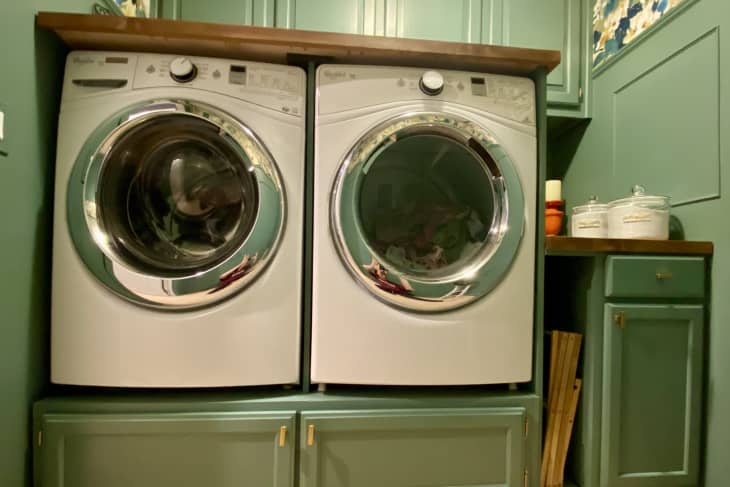
Green paint and wallpaper add style.
Once the ceiling was smoothed, she settled on a bold nature-inspired design with green paint and a floral wallpaper. The wall paint is Sherwin-Williams’ Studio Blue Green, the ceiling and trim Sherwin-Williams’ Pure White, and the floral wallpaper is from Wayfair. (Here is a similar pattern in a different color!)
“I love the design aspect most, so I spent a lot of time researching colors, wallpapers, and potential designs for the counters and side cabinet,” Dana says.
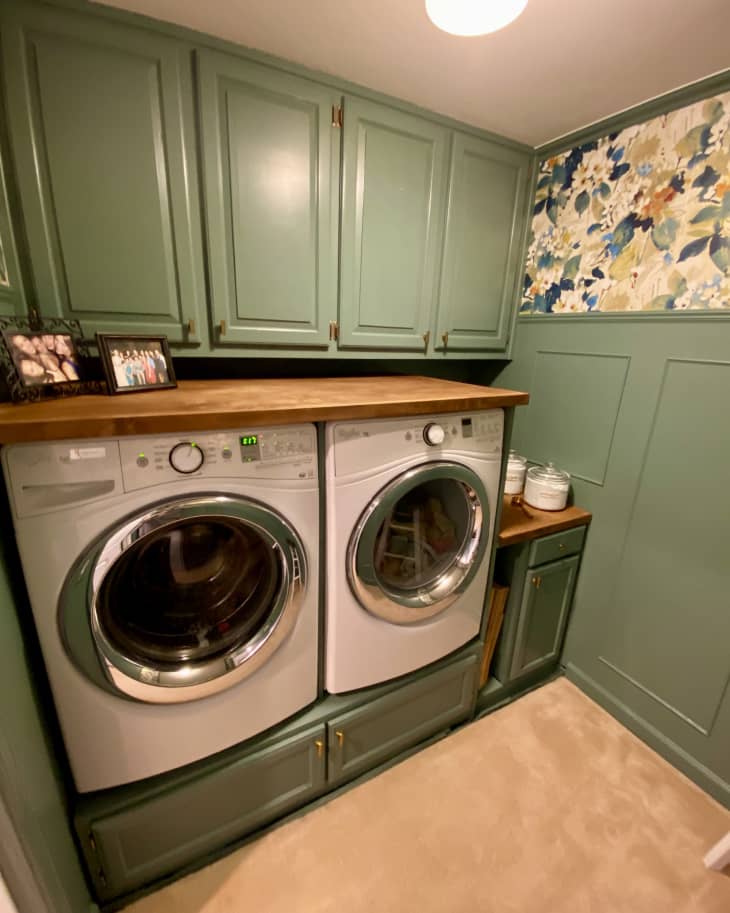
Woodworking projects added functionality.
Aside from the ceiling, the other big DIY jobs in the laundry room makeover were building cabinets for storage and a countertop for folding, and adding molding and trim.
Dana already had the pedestal base for underneath the appliances (her dad made it a few years ago), but she did add $100 custom doors to conceal the storage slots underneath. She also added a new cabinet to the right of that and upper cabinetry. Although she was intimidated by the measurements, “In the end, those pieces came together really easily without a lot of hassle,” she says.
The molding and trim projects, however, were a bit more challenging. She didn’t realize until it was too late that the foam molding she ordered had a small “ledge” that sits right under the ceiling instead of touching it, and she would buy slightly larger moldings for the box trim if she were doing the project over again.
“I was trying to save a little money and went with a very affordable profile: only $5 per 8-foot piece,” she says. “Because the room was small, I thought the small trim would work … but a slightly wider trim would have looked even better, and it would have been easier to work with. My air-pressured stapler split a few pieces of the trim due to it being so thin.”
Using leftover materials helped cut down costs.
Something Dana is particularly proud of, though, is how she kept costs low. She estimates her project total was around $800. Like with the base cabinet underneath the appliances, Dana used a lot of leftover materials — the last inch of wood stain, paint primer, or wallpaper glue, for example. She also used door paint and ceiling paint from a previous project.
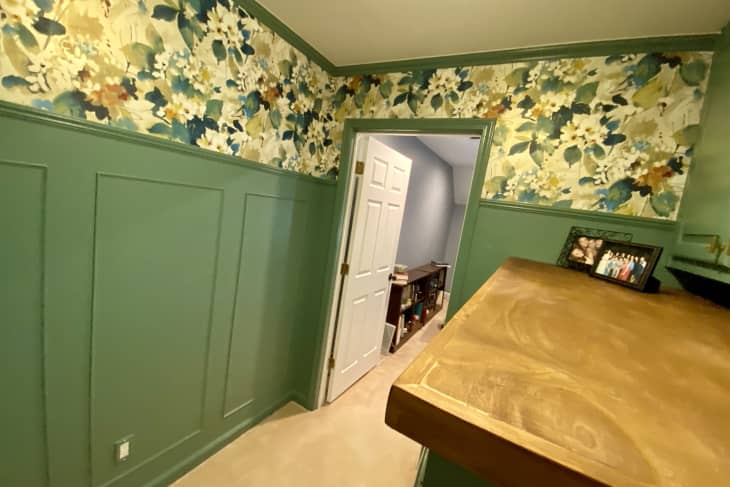
Dana learned a lot of new skills during the renovation and found a lot of satisfaction going down the DIY route. “The laundry room is attached to my office, and I work from home. It sits just right of where I work all day every day,” she says. “Having the beautiful colors of the wallpaper, the simple elegance of the box trim, and the calming effect of the deep green really bring me joy during my work day.” Plus, Dana says that having a thoughtfully designed laundry room keeps it from becoming “clutter headquarters.”
“I look forward to heading in there to start a load of laundry now!” she says. “I joke with my friends that I’m still shopping for a tiny armchair to put in the corner so I just hang out there — reading, sipping tea, and watching the clothes just spin and spin.”